Monday, February 10, 2014

Leftover Bean Water (Pot Liquor) Bread


I wasn't really sure what to title this post.  I know the term pot liquor but it's not a term I grew up with.  However, bean water just sounds weird.  I dunno.

Let me back up.

Pot liquor (or pot likker, or potlikker) is the water that remains after cooking beans or greens.  It's a term mostly used in the South.  It forms a flavorful base for soups.


We found ourselves with a little over three cups of bean water after Mr. Bread Maiden made a batch of beans for cassoulet.  Since he was already making stew, there wasn't much point in using the bean water to make another soup.

But what about using it for bread?

I recalled a recipe for potato water bread in Peter Reinhart's book, which relied on the starchiness of the potatoes leaching into the water.

I put "bean water bread" and "bean pot liquor bread" in google but didn't come across any recipes for how to use it, except a commenter on this thread who said it "might" work.  Like me, he/she was familiar with Peter Reinhart's potato water recipe.

Other recipes I found called for bean water AND beans, but I didn't want to do that.  Plus Mr. Bread Maiden had used all the beans.

I figured if it didn't work, I would've thrown the water out anyway so it wasn't a huge loss.

I used my usual 2/3 hydration loaf, as seen here.   However, I did have to add extra bean water.  The extra protein doesn't dissolve into bread as easily as straight water.


You will need (for one loaf):
375g mix of AP flour and bread flour
250g of leftover bean water, maybe more
7g instant or active dry yeast
7g salt

1. Weight out your flour in a large bowl.  Add the salt and yeast to the flour and whisk thoroughly.


2. Weight out 250g of the bean water, keeping some on hand in case you need it.  As you can see, it'll be about one cup.


3. Pour the bean water into the bowl with the flour, salt and yeast.


4. Grip the bowl with your left hand. Using your right hand, vigorously stir to incorporate the dough.  If it seems dry, add a splash more of your bean water.  When it comes together easily, cover the dough with plastic wrap.


5.  Here is where I feel sorry for people who insist on kneading their bread for 15 minutes.


After 15 minutes of resting, take the plastic wrap off the bowl (don't throw it away!) and gently fold the dough a couple of times.  See?  The dough is smooth and pliable like you just spent 15 minutes kneading it into submission, and you didn't do a darn thing.  Ok, now put the plastic wrap back on and let it rise another 2-3 hours, until it has doubled in size.


6. After it has doubled in size, punch it down ONCE (one punch to deflate it!) and then gently shape it into a ball.  Transfer it to a sheet of parchment paper to rise a second time.  Preheat the oven to 425 degrees F and slide your dutch oven inside the oven to heat up.


7. When the oven is ready, remove the plastic wrap and score the top of your loaf with a sharp knife.


8.  Transfer the loaf on the parchment paper to the dutch oven and bake, covered, for about 25-30 minutes.  Remove the dutch oven lid and bake another 10-15 minutes until the loaf is nicely browned and the top is solid when tapped.


This loaf has a very soft crumb, which I believe is due to the bean water.


I have been using it all weekend for sandwiches, french toast, and just spreading with butter and sprinkling with sea salt.  There is no detectable "beany" taste.

So, Mr. or Ms. Commenter on that website: it can be done!  You can successfully use leftover bean water in bread, and I plan to do it whenever I have bean water on hand.  You should too!


Wednesday, January 22, 2014

mini puffy pancakes


When I was a kid, I loved silver dollar pancakes.  They are just regular pancakes, only smaller.  Yet the fact that they were small and cute made them special.  Mini puffy pancakes are kind of like that.

I made puffy pancakes in a cupcake pan ONCE for Little Bread Toddler and now he requests them all the time.  He calls them puffy pies (I think because when I make a big puffy pancake I use a pie dish.  They are the kind of thing you make on a weekend when you have absolutely nowhere to be.  This makes enough for two people, I would say.


You will need:
A cupcake pan (or two mini cupcake pans, you high achiever you)
1/2 cup milk
1/2 cup AP flour
2 eggs
pinch of sugar
pinch of small-grain salt (not kosher salt)
dash of vanilla (optional)
pinch of cinnamon (optional)
butter

1. Preheat the oven to 425 degrees F.
2.  Take your butter and flick a tiny piece (maybe 1/8 teaspoon size) of butter into each of the cupcake holes of your pan.  Set aside.


3. Whisk together the flour, salt and sugar (and cinnamon) in a large measuring cup.  Set aside.

4. Combine the milk and vanilla in a small measuring cup. Set aside.

5. Crack the eggs into a small bowl.  Set aside.


6.  When your oven is at about 400 degrees F, slide your cupcake pan into the oven to heat up.

7. Once the oven is preheated, pour your milk mixture and eggs into the large measuring cup with the flour.  Whisk to combine.


8.  Now take out your cupcake pan (be careful- it's hot!)


and carefully ladle a little of the batter into each cupcake.


9.  Return the cupcake pan to the oven and set your timer for 12 minutes.


10.  When your timer goes off, call everyone into the kitchen to see you remove your creation.  This is very important because in the span of less than a minute, they go from looking like this:


To this:


To this.


But they are still tasty, don't worry!  I like them with syrup.  The nice thing about mini puffy pancakes is that they are bite size, so no cutting involved.


One last thought: the past couple of times I've made these, as I was flicking butter into the cupcake pan, I would think to myself that this is the kind of thing I will make for my firstborn but probably no subsequent children, because it's also kind of a PITA.  But as I thought more about it, sometimes as parents we happily do things for our children that are a PITA.  And I probably will make these for future additions to the Bread family, as PITA-ful as they are.  Sometimes a child's joy trumps PITAness.

Wednesday, December 18, 2013

Toddler-approved Chinese fried rice on a weeknight


Fried rice has become a staple dinner in our house.  It's my go-to dish once a week, and it's great because it makes lots of leftovers and can be scaled up or down.  Our favorite Indian take-out place always gives us extra rice, and this recipe uses it up beautifully.  The recipe is best with pre-cooked and cool rice, not hot rice.  If you already have the cooked rice, the rest takes at MOST 15 minutes from start to finish.

Little Bread Toddler LOVES this recipe, which is great because I use it to sneak in all manner of vegetables and eggs for protein.


He's a messy eater.

You will need:


One yellow onion
One bag frozen vegetables
Three cups of cooked, cold rice (Jasmine is best, but whatever you have on hand is fine)
Three eggs (lightly beaten)
Three tablespoons each of mirin, sesame seed oil, soy sauce, and peanut oil

1. Dice the onion.
2. Pour the peanut oil into the skillet on medium-high heat.  When the pan is ready (the oil is shimmering) add the onion and saute until translucent.
3. Add the vegetables to the skilled and coat with the oil.  Cook for a few minutes until they seem not frozen.
4. Add the rice to the skillet and toss around to combine.  
5. Remove the vegetables and rice to a large bowl.  Use your spatula to scrape most of the rice and vegetables out of the skillet then return to the fire.  Add more peanut oil, about a tablespoon.
6. While you're waiting for the peanut oil in the skillet to heat up, add the soy sauce, sesame seed oil and mirin to the bowl of rice and vegetables.  Stir to combine.
7.  Add the eggs to the skillet and scramble them.  Then using your spatula, break the scrambled egg into small pieces and add them to your rice and vegetables.
8. Tada! You're done!  Time to eat!


How awesome does this look?  


Little Bread Toddler saw it in the skillet and said, "I want something else," then proceeded to eat four bowls of the stuff.  Again, he's a messy eater.  


It's that good!


Sunday, December 8, 2013

Sour cream pancakes - Best Pancakes EVER


I make a lot of pancakes.  This is my pancake journey.

Back when Little Bread Toddler wasn't drinking milk, it was a way for us to sneak it into his diet.  Now he alternates between scrambled eggs and pancakes most mornings.

For about years, I used the Joy of Cooking's pancake recipe.  It was pretty easy and I was able to improve my technique making a batch a week.  However, they weren't great.  They tasted good but they kept coming out flat.  I wanted nice, puffy pancakes.

I tried Smitten Kitchen's pancakes, which rely on beaten egg whites for lift.  While they have a delicious tangy taste and do puff up when they cook, they also immediately deflate as they cool, which means they are wonderful freshly cooked but the pancakes I freeze don't do so well.  Also the extra step of beating the egg whites to stiff peaks takes too much time.

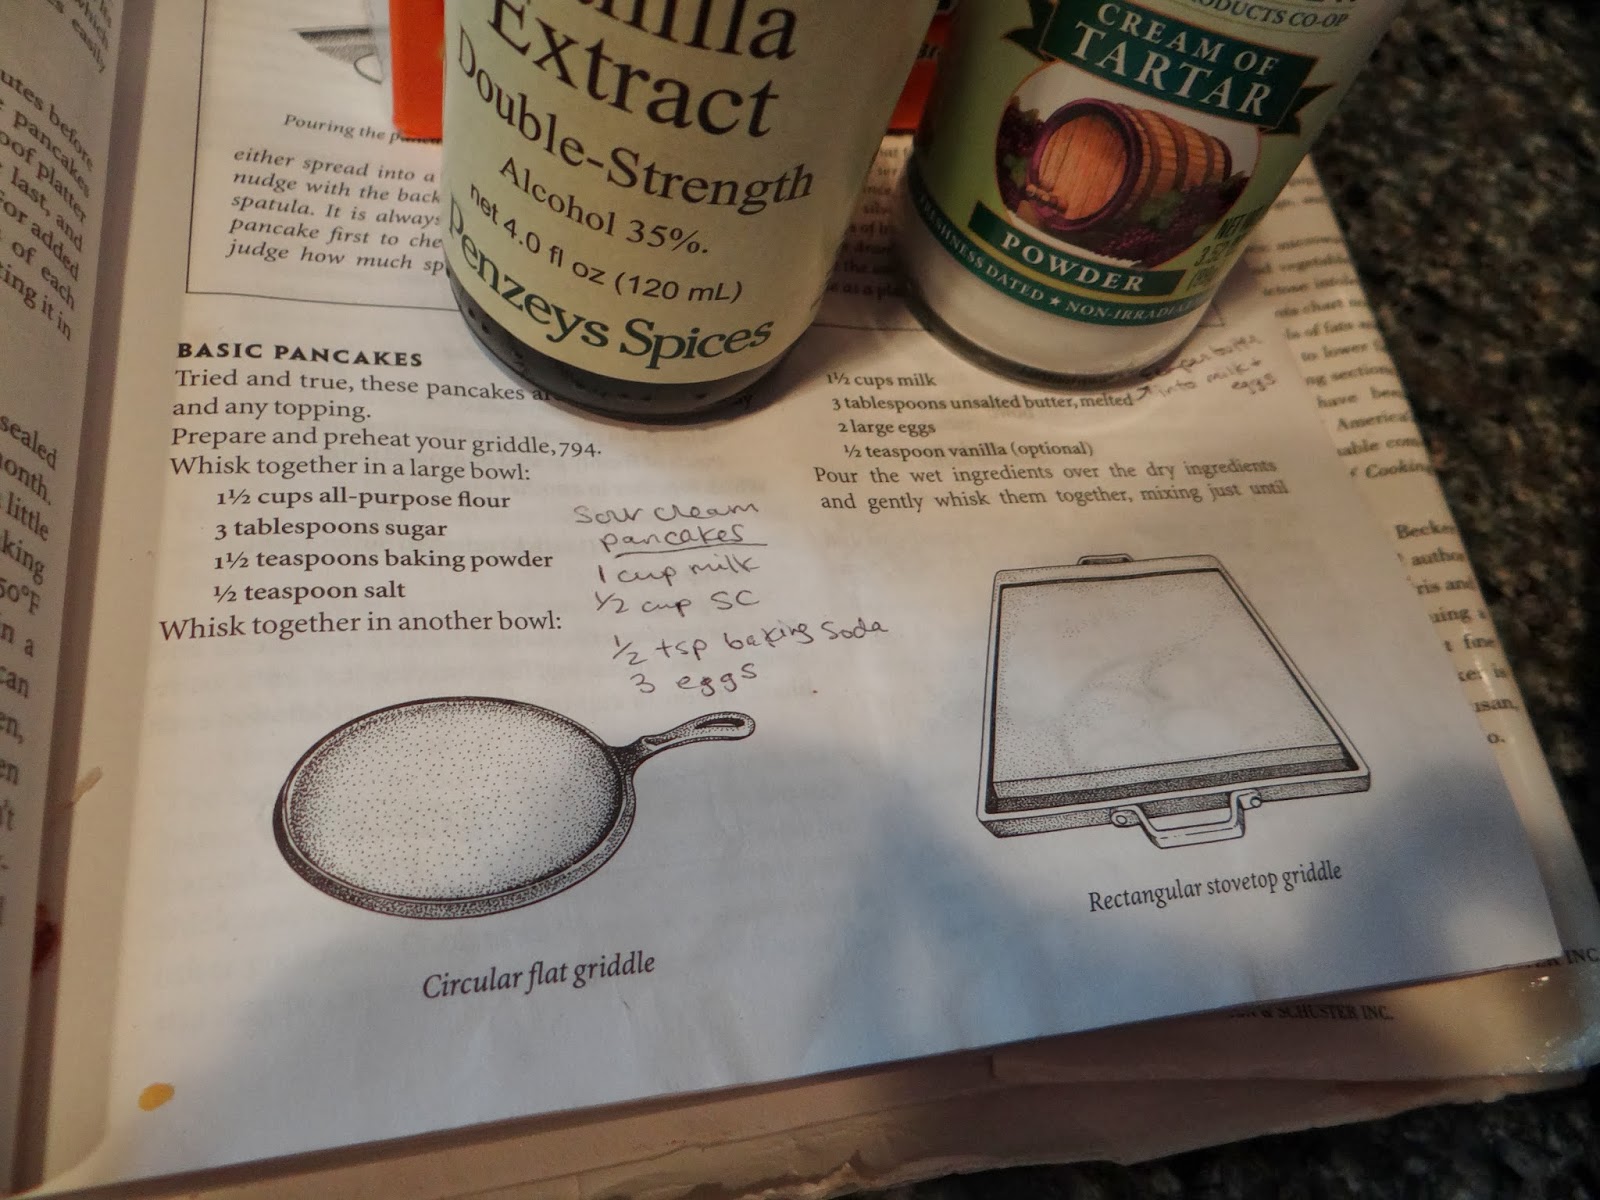
Then a few weeks ago, I ran out of milk.  All I had was some sour cream, so I added it in and compensated for the decreased liquid by throwing in an extra egg.  I also added some baking soda to account for the added acidity from the sour cream.  The results were amazing.  So much so that I annotated my Joy:


These sour cream pancakes are so delicious, puffy and light.  They also keep really well in the freezer (more on that later).

To make these, you will need:


Sorry.  For some reason I pulled out the cream of tartar instead of baking powder when I took this picture.

The dry ingredients:
1 1/2 cup AP flour
3 tablespoons sugar
1/2 tsp salt
1/2 tsp baking soda
1 1/2 tsp baking powder

The wet ingredients:
1 cup milk
1/2 cup sour cream
3 eggs
3 tablespoons butter (melted)
splash of vanilla extract

1.  Pull out your griddle and get it heating up while you combine the ingredients.  I usually like the griddle to be at about 400 degrees F.  If you don't have a thermometer, you will know the griddle is ready when water or butter starts sizzling upon contact.

2.  Mix together your dry ingredients in a big bowl.  The dry ingredients can sit for a while.


3. Test the griddle to see if it's ready.  If it's ready or almost ready, you can start mixing together the wet ingredients.  Measure your milk into a large measuring cup.  Gently beat your eggs and add them to the milk along with the vanilla extract.


4.  Here is where the technique comes into play.  Presumably you've just added cold eggs to the cold milk.  And now you're going to add warm, melted butter?  That butter is going to congeal up right away, or the eggs will curdle.  Either way, not a good situation.  What you're going to want to do is temper the butter so it is lowered to the temperature of the eggs and milk.

5. First, take your whisk. This is very important.  Also a tablespoon.   Start gently whisking the melted butter.  Scoop up a tablespoon of the egg/milk mixture and drizzle it into the butter as you're whisking.  Add another tablespoon of mixture and keep whisking it in.  Keep whisking and adding milk until the butter is lukewarm.  Congratulations, that's tempering!

6.  Now that your butter has cooled off, you will do the opposite thing you just did: drizzle the butter into the milk and eggs while you are whisking to combine thusly:


7.  If the griddle is ready, now is the time to add the wet ingredients to the dry ones.  Whisk to incorporate all the flour but stop while there are still a few clumps.  The batter will be very wet.


8.  If the griddle is good and hot, take a dollop of butter and grease the griddle.  I use a paper towel to push the butter around.


9.  Using a serving spoon or ladle, pour some batter onto the griddle from a height of about one or two inches. That helps the batter form a nice round shape.


10.  You will know it's time to flip when the top has some popped bubbles but mostly when the top stops being slick and shiny.


The sides of these are also pulling away from the griddle, so I knew they were ready to flip.  It just takes practice for you to really tell when they're ready.


The second side takes less time than the first.  When they are done, put them on a plate to cool.  You can even put them in a warm oven until you are done with the whole batch and then serve them later.


PUFFAY.


Here is my beautiful set-up to showcase my lovely pancakes:


Attracting some attention


Wait. STOP.  I'm trying to get a picture here...


No no no... that fork was part of my beautiful tablescape ...


Oh well.  That's the way it goes with pancakes in this house.


Sometimes he drinks coffee and pretends he's a grown up


I know I promised some tips on freezing pancakes.  The easiest way is just to throw them in a ziploc bag and call it a day, but I have found that makes them stick together.  The BEST way is to lay them out on a cookie sheet in the freezer, then transfer them to a ziploc when they are a little frozen.  That way they don't stick together.


It's weird but it works.  And that way LBT gets pancakes any day of the week he wishes.

I hope you try these sour cream pancakes.  I bet they would work with yogurt too.  Go crazy!