Wednesday, December 30, 2015

Most popular posts of 2015


Hey everyone!  We're two days away from 2016, so for the first time I'm jumping on the 'top posts' bandwagon.  This was a great year for me and the Bread Maiden blog.  We welcomed our second Little Bread Dude into the family, and I also welcomed my new series, The Science Behind... to my blog.  In the past two months I have written and published more than twice as many posts (28!) as any other entire year since I started this blog!

I've been so amazed to see the response both have gotten, and I hope to continue adding more scientific posts in the new year.  It has been such a pleasure to do more "deep dives" into the science behind bread baking and getting to share what I've learned over the years with my readers.


So without further ado, my most popular posts written in 2015.

10) The Science Behind... Measuring Your Ingredients.  I'm really glad this post was one of the most-read of the year.  Good bread really starts with measuring accurately.


9) The Science Behind... Raspberry Breakfast Cake.  This was a new favorite recipe in 2015, based on Shauna Niequist's blueberry yogurt cake.  I've made it countless times this year, including one unforgettable instance at the beach house this summer, when I took the cake out of the oven and set it (in its pyrex baking dish) on the stovetop to cool, then went out to the beach.  While I was out there, my MIL accidentally turned on the wrong electric burner to heat up a kettle of water, and the pyrex dish EXPLODED into millions of tiny glass shards that rained down on my beautiful, uneaten cake as well as all over the kitchen!!!  Once the mess was all cleaned up, it became a family joke.  I forgot to share that story in my original post, but now it's here.


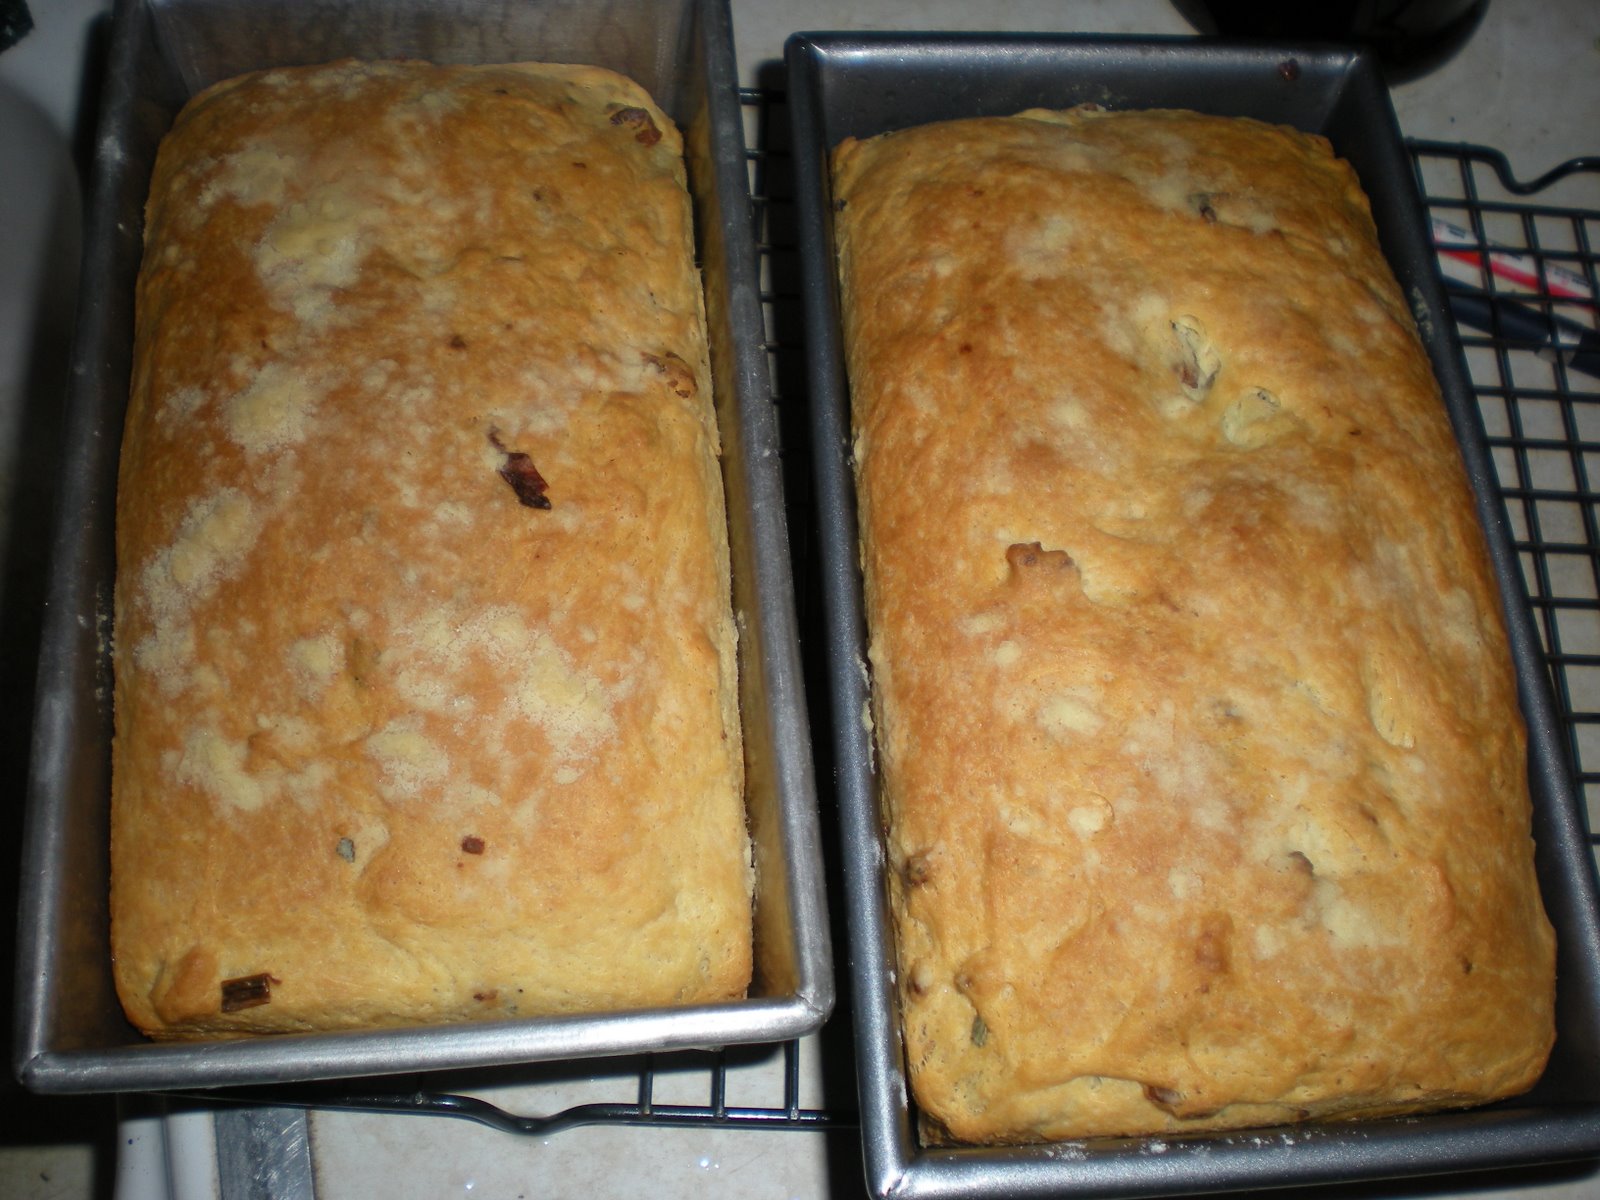
8) Kugelhopf au lard.  Another of my favorite recipes!  I've been making this recipe forever and it's always a hit.  I mean, how can you go wrong with bacon?  Here's a The Science Behind... kugelhopf au lard post for readers who have gotten this far ;)


7) The Science Behind... Thanksgiving Hangover Muffins.  I'm gratified that so many of my Science Behind... posts made it to the top ten.


6) The Science Behind... hydration and baker's percentages.


5) My Favorite Recipe for Hamburger Buns and Rolls. Again, another favorite recipe that I was excited to share.   I was surprised to discover it doesn't have a Science Behind... post.  Consider it forthcoming.


4) Thanksgiving Hangover Muffins.  My two Thanksgiving posts made it in the top 10.  I've noticed that holiday breads do well on my blog, so maybe that's another area I can expand on in 2016.


3) Raspberry Breakfast Cake.


2) The Science Behind... series page.  The page where I keep all my Science Behind... posts was the 2nd most visited post on my blog.  Incredible.  Again, thank you to my readers for making this series successful.  I have so much fun thinking up new posts and writing them.
.
.
.
.
.
.
.
And now, the most popular post of 2015 is *drumroll please*

1) Bread Camp Round II.  I was not expecting this to be the most popular post!  What an interesting twist.  I'm not really someone who makes resolutions, but here is one I hope to keep in 2016: I'd like to hold more Bread Camp sessions in the coming year.  They are really fun.


So those are my most popular posts of 2015.  Happy New Year, and I'll see you in 2016!

Tuesday, December 29, 2015

The Science Behind... kugelhopf au lard (bacon bread)


Hello everyone!

I hope you enjoyed my post on a favorite recipe of mine, kugelhopf au lard.  I also call it bacon bread, because it's easier for people to remember.  This bread is enriched x1000: eggs, milk, bacon drippings, and butter, butter, butter!

Therein lies the difficulty with this bread - but it's totally worth all the effort.

In this post I will discuss:

1. What an enriched dough is - and what each ingredient does
2. What is the relationship between the strengthening ingredients and the softening ones?
3. Why do I need to do the stretch and folds?
4. Why do I add the bacon at the end?
5. Shaping your dough into a loaf shape

Ok, here we go!

1. What is an enriched dough?  You probably already know that the simplest bread only consists of four ingredients - flour, water, yeast and salt.  An enriched dough, therefore, is one that has other ingredients added to it.  Usually it's used to describe doughs with lots of ingredients that SOFTEN the dough, such as milk, eggs and butter - basically ingredients that add fat.  The doughs also tend to be sweet with added sugar or honey.  They might even include dried fruit and nuts or, like this one, bacon.  Typical enriched doughs include challah, stollen, brioche, panettone - basically your holiday breads.


The fat in a bread recipe creates that soft texture each of these breads is prized for.  Enriched doughs also make good sandwich breads because of the small holes in the interior of the bread.

2. What is the relationship between the strengthening ingredients and the softening ones?  If you've been reading this series on The Science Behind..., you know that the most important chemical relationship that makes bread possible is the interaction between flour and water to form gluten strands.  These long strands stretch to form a net that traps carbon dioxide bubbles, leading the bread to rise.  The more you knead your dough, the stronger the net becomes.  A strong net traps more carbon dioxide bubbles, resulting in a light, airy dough.

However, in an enriched bread, the fat in the butter, milk, eggs, lard or bacon drippings SOFTEN the gluten net.  The dough is stickier and acts like a wetter dough.  I might even call it "flimsy" in the sense that it doesn't easily form the round ball of dough that is the result of good strong gluten formation.

The ingredients also weigh down the loaf, so during baking it has the tendency to become dense and not airy.  To counterbalance this tendency, a lot of yeast must be added so it still rises and you still get the oven spring.  A deft hand is required to make sure the dough still creates the gluten net that will trap carbon dioxide gases from all that yeast.


3.  Why do I need to do the stretch and folds? As I mentioned in the last question, enriched doughs have a tricky confluence of ingredients to work with: first, all those heavy fats that want to weigh down your dough, softening the gluten strands and making it all sticky, and second, lots and lots of yeast that still needs a gluten net to trap them all in and guarantee a risen loaf.  Whereas in my usual baking I use a little bit of yeast and let time create the gluten strands naturally, I don't have that luxury here.  Commercial yeast acts quickly when you have a lot of it - you might have two hours during the leavening period.  You will need to mess with the dough to make sure the gluten net forms before the rise.  And sticky dough does NOT appreciate kneading.

Enter the secret weapon: the stretch and fold.  Stretching and folding is like kneading in slow motion.  You don't have to do it very much, and it yields big results for doughs that are wet or generally unworkable.

Here is Peter Reinhart demonstrating the stretch and fold technique.

What does the stretch and fold do?  When you first mix together the water and the flour, the protein in the flour (glutenin and gliadin) bonds with the water to form gluten strands.  But at first, these strands are all tangled up.  What kneading (or stretching and folding) does is stretch out the gluten strands so they are long and taut, forming the net to trap the carbon dioxide bubbles created by the yeast.
I kinda like this mental image of gluten strands.  This is what you want gluten to do.  Stretching and folding achieves that.

Since this dough has so much yeast, you need to make sure that gluten net forms quickly.  So several sessions of stretching and folding are needed.  You want to do one about every 15 minutes until you start to see the dough ball take shape.  Thusly:


4. Why do I add the bacon at the end?  It has to do with -- you guessed it -- the gluten formation!  If you added the large pieces, like nuts, dried fruit, or bacon at the beginning, the gluten strands would have trouble forming around them.  By adding them at the end, the gluten net has already formed, and you don't have to worry about it.  We added the milk, eggs and butter earlier on because they contribute to the hydration of the loaf and thus are necessary for the creation of the gluten strands.  Bacon does not.

5. Why do I need to shape my dough into loaves?

During the baking process, yeast releases one last huge blast of carbon dioxide, causing your loaf to expand in all directions.  This process is called "oven spring."  Any weak points in your dough's outer crust will explode more forcefully, which is why you want to make sure your bread is evenly shaped all over so it rises uniformly.  If you choose to bake these loaves in bread pans (which I recommend), there is a particular shaping technique that works best.  It's almost like making a jelly roll, and this King Arthur Flour video describes it well:


I hope this post has given you some insight about baking enriched breads and the motivation to try my kugelhopf au lard.  You won't be sorry!

Tuesday, December 22, 2015

Kugelhopf au lard, part II


The last time I blogged about this bread was six years ago, and it was the laziest post I think I've ever written.

Here it is in all its glory:
------------------------------------------------------------------------------------------------------------------
So, as some of you know, Mr. Bread Maiden and I are the proud owners of Jennifer McLagan's Fat cookbook, and we've been working our way through it. Perhaps the most interesting recipe we've tried so far is what I made yesterday, kugelhopf au lard. I've been on this fruit bread kick lately, so you might be asking why the sudden shift to savory. Well, this bread is actually very similar to the stollen. It uses mostly the same ingredients, in the same order, except at the point where one would add fruit to the stollen, you add instead bacon, shallots and sage. 
The reason this recipe jumped out at me initially was the title. This dish comes from the Alsace region, and the German-French fusion could not be more obvious. The dough is very German, with its eggs and milk, but the french added shallots and sage and made it lighter. Brilliant.
Because yesterday I was busy making three recipes at a time, I didn't get to take as many pictures or pictures of every step. So until I make another one, these will have to suffice.
The milk and eggs in this recipe make the dough so wonderfully light (until you add the grease and bacon). The dough was so oily it was hard to manage. But it rose beautifully both times. 
______________________________________________________________________

That's it!  That's the whole thing!  I didn't have a chance to take pictures, the end.

Obviously I will be taking another crack at it.  Because Kugelhopf au lard is a fantastic recipe and it deserves to be shared with the world.

The cookbook where the recipe comes from, Fat by Jennifer McLagan, is awesome.

You will need (for four loaves):

8 cups (1000 g) all-purpose flour
2 teaspoons salt
6 eggs
2 cups (500ml) milk, warm
300 g butter, softened plus another tablespoon or so to butter a large bowl and four bread pans
2 shallots, diced finely
2 tablespoons thyme or sage
1 pack of bacon, thick-cut
4 teaspoons yeast
2 tablespoons of sugar


Here's a picture of the ingredients in mise en place, also because in the first shot I forgot to show the bacon!


1. In the bowl of a stand mixer (with the paddle attachment), whisk together the flour, salt and thyme.  The original recipe calls for fresh sage, but I didn't have it so I used dried thyme.

2. Warm the milk and add your yeast and sugar to one cup of it.  Let it get all frothy.  If it doesn't get frothy, throw it out and start over.  Either your yeast is bad or the milk is too hot.  If you can't stick your finger in the milk comfortably, it's too hot.


3. When your yeast mixture is frothy, add it to the flour, salt and thyme.  Add the rest of the milk too.

4. Now add the eggs, one at a time.  Your dough should be really, really wet and sticky.

5. Switch to the dough hook.  Knead on medium for 10 minutes.  At this point, my dough looked more like batter and it was super sticky.  Clearly, the dough hook wasn't doing it.  And given the high hydration of this dough I was going to have trouble kneading it.  Problem was, the dough also has a lot of yeast, so it was going to rise quickly.  I decided to use my secret weapon for wet doughs: the stretch and fold technique.


6. I buttered a very large bowl and removed the dough from the mixing bowl into the large buttered bowl.  With clean dry hands, I took one side of the dough and stretched it gently, then folded it on top.  This step takes the squiggly gluten strands that have been created from the interaction of flour and water and stretches them out, so they start to provide a structure for the dough.  Do four stretches, rotating the bowl each time so you are stretching out and folding over a different corner.

Here's a video of the process:


As you can see, even after only four stretches, the dough is starting to form more of a ball.  Cover the bowl with saran wrap and let sit for about fifteen minutes.  Then do another series of stretches and folds.

More structure.  In another fifteen minutes, do another series of stretches and folds, then cover and let rise for about 1.5 hours.


7. In the meantime, butter your bread pans.


8.  Now you will want to fry up your bacon.  Cut it into a small dice and fry until just crispy.  Add the shallot.  Then let the bacon cool COMPLETELY.  It should be room temperature for the next step.


9.  At the end of 1.5 hours, your dough should look like this:


Punch it down, then add the bacon and drippings to it.

Using the same stretch and fold technique you used above, gently coax the sides of your dough around the bacon and drippings until they are all incorporated into the dough.  Since you already have a wet dough, this is going to get very wet and greasy again.  Don't worry, it'll all work out in the end.

10.  Let the dough rest in the bowl for about ten minutes, then use a bench scraper to divide the dough into four equal (by weight) parts.  This is very, very important because you want them to cook evenly in the oven later.  The dough should be pretty gloopy.  But again, stretch and folds are your friend!  Gently shape them into circles for another rest.


11.  At the end of this rest, roll the dough up into a Swiss-roll shape and place them into buttered bread pans, seam side down.  Preheat your oven to 400 degrees F.  Cover the loaves with saran wrap and let them rise for 45-60 minutes.


12. Bake your loaves for 35-40 minutes.  Remove from the oven when the top makes a satisfying thump when tapped with your fingernail.  Let them rest for about ten minutes before removing from the bread pan to a cooling rack.  Because these loaves are so greasy, I line the cooling rack with a paper towel.


They taste like a marriage of biscuits and challah.  They are seriously so good.  Try making a BLT with them sometime.  Or french toast!

These are going to be Christmas presents!  Shhh, don't tell anyone.