Sunday, May 25, 2014

Sunday School Baking: Brigadeiros for the story of Simon Peter


This month in Sunday School we've been following the story of Peter (aka Saint Peter, aka Simon Peter), and every week the kids have been asking me to make these candies.  They've even gone so far as to ask God for divine intervention during prayer.  So I decided that for the last Peter lesson I would bring them in, and the kids went wild.

I first made them last year during our David and Goliath lesson (since brigadeiros look like little rocks), but the kids made the connection immediately when our pastor taught them that Jesus named Simon 'Peter' because he was to be the rock upon which the Church would be built.  Or as one of the kids calls him, "Rock-o-Peter."

This recipe is totally easy to make. But don't tell them, or they'll want me to make it every week!

You will need:


1 14-oz can of sweetened condensed milk
3 tablespoons cocoa powder
1 tablespoon butter, plus more for greasing a pan
1/3 of a cup of whatever you plan to coat the brigadeiros with: sprinkles, cocoa powder, coconut flakes or crushed nuts all work well.

1. Before you do anything, grease a flat or shallow pan.  Set it aside.  It doesn't need to be big.

2. In a small pan, add the condensed milk, cocoa powder and butter and stir on medium heat with a wooden spoon until it boils.


3. Once it starts boiling, turn it down to low and continue stirring. You don't want any sticking to the bottom, so use the wooden spoon to scrape the bottom.


4. Continue stirring for 10-15 minutes while the mixture thickens.  Here it is after about 5 minutes.


After 10 minutes:


And after 15 minutes, it started to develop a "film" on the bottom that I couldn't scrape off.  That was how I knew it was done.   This is the film; unfortunately I was working quickly at this point and couldn't stop to take a picture.


5.  Using the wooden spoon, I transferred the mixture to the greased pan and let it cool to room temperature.


6.  The colder the mixture, the easier it is to shape and roll into balls.  So I threw it in the fridge for about half an hour until it was very firm.  You can work with it at room temperature if you want, but it's very, very sticky.

7.  Now you will want to prep your hands and any tools you plan to use.  I used small muffin cups to keep each brigadeiro separate and that method worked out well.  You will want to have your toppings ready.  Coat your hands with butter and if you plan on using a scoop, coat that with butter too.

8.  Take a little bit of the mixture in your hands and roll it around until it forms a ball.  I made them bigger last year, but some of the kids (and I) found them a bit too rich and sweet so I decided to make them smaller so they would be just enough.  If that makes sense.  I used a 1/2 teaspoon scoop to get the balls the right size.


9. Drop it in the topping of choice and roll it around until it is completely coated.


10.  Gently move the finished brigadeiro to its muffin cup and move on to the next one.  Since mine were about 1 teaspoon in size, this recipe made a ton.  I think it made about 50 brigadeiros.


I brought the ones for class on a pretty platter.  The rest I covered with plastic wrap and stored in the fridge.  The key is keeping them cool so they don't melt.  The nice thing about these is that they are gluten- and soy-free, and nut-free if you don't roll them in nuts. They are a sweet treat that the kids really enjoyed as a farewell to Rock-o-Peter!

Sunday, May 4, 2014

The Bread Maiden's essential baking equipment guide

I have been trying to come up with a bread-baking tutorial that, in the span of a couple hours, will convey the breadth and depth of my knowledge about baking.  As you might imagine, it's ending up much longer than I anticipated.  I cannot seem to cut it down to a more manageable size.

What might be easier and less overwhelming is dividing up the material into smaller thematic chunks.  So this is the first step to baking: assembling the necessary equipment.

Just a note before I get started.  Some cleverer bloggers have written posts like these and imbedded "affiliate links."  There are no affiliate links in this post, or on this blog for that matter.  I haven't received anything free in exchange for reviewing or pushing it on the blog. The products here are actually what I use and love, and I won't receive any sort of monetary reward if you buy the equipment I have written about here. 

1. Kitchen scale

My baking got much more accurate, consistent, and cleaner once I bought a kitchen scale.  Once I started measuring in weight, I could tell the hydration of my dough and correct mistakes like adding too much flour.  I could account for weather and humidity changes in the air that caused the dough to absorb more or less flour.  I could make my rolls all the same size so they would cook evenly.  And most importantly, I used many fewer dishes and tools, because I could measure everything in the same bowl using the "tare" or "zero out" feature, which meant fewer dishes to wash.  Any baker will tell you that if you want to vastly improve your bread game, you need to get a kitchen scale.

2. Bench scraper


I like this scraper because it easily and cleanly divides the dough into smaller pieces, and I use it after I have kneaded on the counter top to scrape up all the little dough bits that are stuck to the counter.  This is similar to the bench scraper I have.  It's all metal instead of a handle that is wood or plastic so it's easy to clean.

3. Glass bowls of different sizes. I have pyrex which works well.  You don't want them to be too heavy.

Often you will want to prepare your ingredients ahead of time, or you need to melt or warm something in the microwave.  Using the right size bowl can save you time, and everything you need will be prepped and ready to go.  I used to use metal bowls, but I feel like glass bowls are better for most things, and they hold onto their heat when a dough is rising.

4. A tablespoon and a teaspoon


I feel like these two are all you really need.  Everything else, such as 1/4 tsp or 1/2 tbs you can probably eyeball.  The reason I use a teaspoon and tablespoon is that some dry ingredients just don't weigh enough to be measured accurately by weight.  Examples are baking soda and baking powder, or a teaspoon of yeast.  Most scales don't measure in smaller fractions than a gram, and so volume measures are the way to go.  My tablespoon and teaspoon have the labels worn off, but I still know what they are because the reason the labels are worn off is because I use them so often.

Edited to add:  Here's the proof!

5. Glass measuring cups

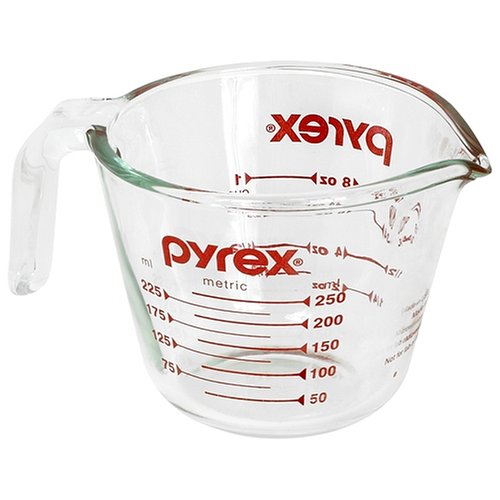
Since you can measure most dry ingredients into the larger dough, usually there is no need for measuring cups.  However, as with the bowls I detailed above, you might want to heat things in the microwave, and glass measuring cups are good for that.  Get one that is 1-cup and one that is a 2-cup measure. Make sure it has all the measurements on it. 

6. Small, sharp knife
 
A small knife is good for scoring (cutting the top of) your loaf so it can expand in the oven while it's baking.  It's better if it's sharper, and you don't need anything bigger than a paring knife.  I've used razor blades in the past which are the best, but if you have kids and don't want to leave razor blades sitting around in your kitchen, a small knife is your best bet.

At this point, your needs will dictate whether you want to purchase any of the following tools.  Think about the type of bread you will be making.  Do you want to make crusty, round loaves or sandwich bread?  If you want crusty, check out #7 and 8.  If sandwiches are your thing, check out #9 and #10.

7.  Cast-iron dutch oven that can withstand temperatures up to 500 degrees F.
If you want crusty bread full of holes, you need a vessel that can withstand high heat while locking in humidity so the crust doesn't burn before the crumb is finished exploding out.  A dutch oven will be your bread savior.

8.  Parchment paper
After a crusty loaf rises the first time, it is transferred out of the glass bowl and shaped into its final shape.  Parchment paper is a great surface for the second rise, because you can pick your loaf up by the corners of the parchment and transfer it to the oven without it deflating.  Also, it's non-stick, so it beats covering baking sheets with butter or flour.

9.  Heavy aluminum bread pans

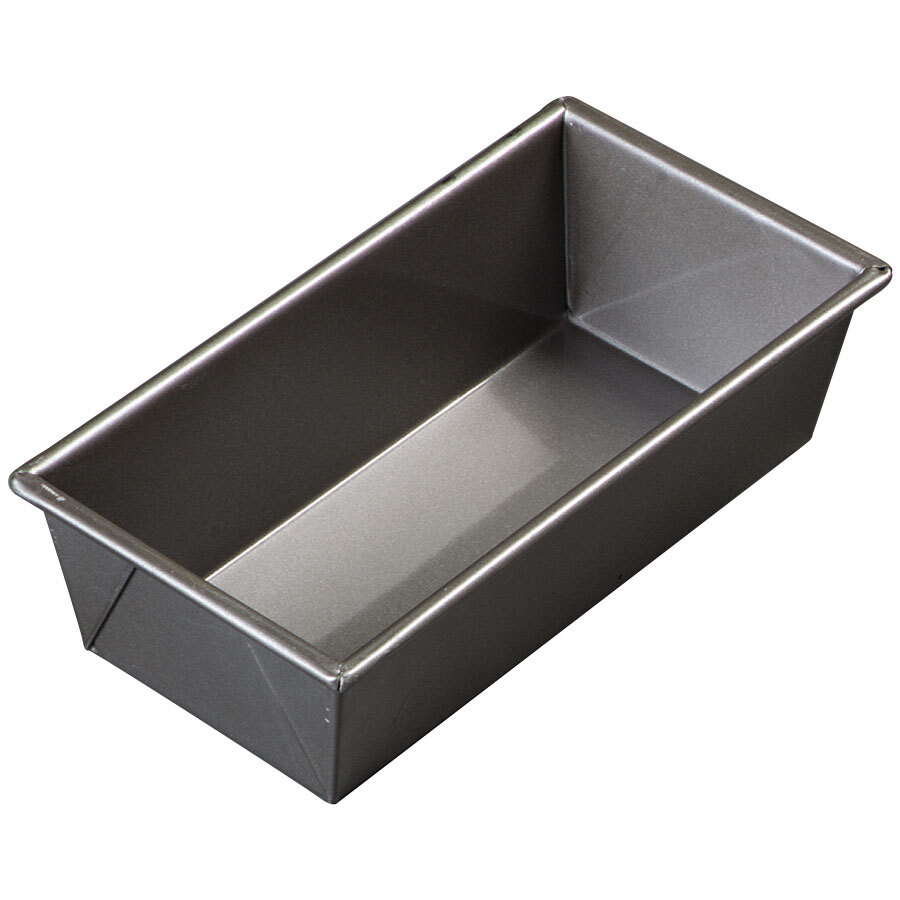
I like the dark non-stick pans.  That's all I have to say about that.  Even though it says non-stick, I would still coat it in butter before baking bread in it.  I would get two or even four in the same size so you can bake multiple loaves at once. 

10.  Elastic bowl covers


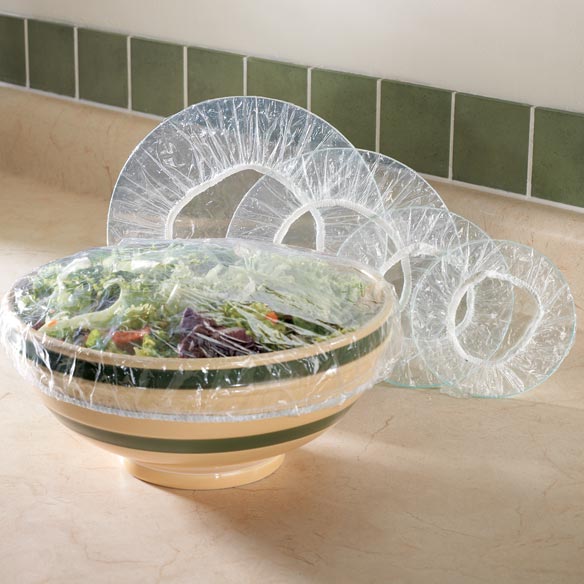
These bowl covers are one of my new favorite things and they've quickly become an essential.  See, while the dough is rising, I cover the bowl (and then the loaf) with plastic wrap, which I then throw away.  I knew it was wasteful, but I didn't know that there was a better way.  These elastic bowl covers are reusable, so they fit over a bowl and then again over the tops of bread pans for the second rise.  For this reason, they work best with sandwich loaves.  I love that I can use them again and again instead of throwing away tons of plastic.

There you have it.  My baking essentials.  There are lots of other things that I use daily, such as my stand mixer, that are nice to have, but aren't necessarily essential.  Your mileage may vary. I hope this helps anyone who is thinking about trying to bake and wants tasty, consistent results.

Friday, May 2, 2014

Sfihas argentinas


This Wednesday, I had thawed ground beef, some kale salad, and a craving for empanadas.  Since my FIL would kill me if I made empanadas without him, I remembered an awesome little pasty I had had in Argentina a few times that had a similar historical trajectory to empanadas in that country: sfihas.

Sfihas (I've also seen them called esfihas) are relatively new on the Argentine culinary scene, but they have a really interesting history.  They are open-faced meat pies that were introduced to Argentina and Brazil by Lebanese immigrants, in much the same way empanadas were.  In fact, my Argentine host mother used to fold her empanadas into a triangle shape rather than the more popular half-moon shape.

Empanadas and sfihas share a similar make-up: ground beef (or other meat) with spices baked in a simple dough.  I found the recipe for my sfihas in this book:


I haven't made a single recipe from the book yet.  But I have been drooling over it ever since I got it, and I knew it had this recipe:


The very first time I had sfihas was in Tucuman visiting my little bro during his study abroad year.  Then I had them again in Cordoba, and again a few years later in Mendoza.  In the decade since I first studied abroad, sfihas have truly taken Argentina by storm.  They are the perfect snack food, small enough to eat in one or two bites.

I have a favorite empanada filling recipe, but for sfihas I wanted something a bit more-- Middle Eastern.  So I adopted the tahini, lemon juice and yogurt from this recipe but added some of my favorite empanada spices too- cinnamon, paprika and cayenne powder.

You will need:


For the dough:
1 cup warm milk
1 1/2 cups AP flour
2 tablespoons sugar
1/2 tsp salt
1 tsp yeast
1 tbs olive oil

For the filling:
1/2 lb ground beef
1 cup chopped onion
1/2 lemon's worth of juice
1 tsp salt
1 tsp paprika
1 tsp cayenne powder
2 tsp paprika
1 tablespoon tomato paste
1 tablespoon tahini
2 tablespoons plain yogurt
1 tablespoon melted butter
1 tablespoon chopped parsley, mint or cilantro (I used kale since I had it on hand)

I made the dough first because it takes some time to rise.

1. Sprinkle the yeast and sugar into the warm milk and let sit for five minutes until it becomes bubbly.


2. Whisk together the AP flour, salt and oil in the bowl of a stand mixer and mix until incorporated.


3. Add the milk and yeast mixture to the flour mixture and knead for eight minutes, adding more flour as needed.


4. Cover and let rise for about 1.5 hours until doubled in size.


5.  Now you can switch to the filling.  Just dump everything into a bowl and mix with your hands to combine.


6. Once your dough is ready, turn it out onto a floured surface and use a bench scraper to cut the dough into 24 (or so) equal pieces.


7.  Roll into balls and let them rest under a tea towel while you line a few baking dishes with parchment paper.


8. Flatten out the balls into disks and transfer to the parchment paper.  You might want to preheat the oven to 350 degrees F at this point.


9.  Place about a tablespoon of dough in the middle of each disk and fold the dough around the filling thusly:


10.  Bake the sfihas for about 30 minutes until the filling is bubbly and the dough is golden brown.


These are great for a snack or dinner with a side salad.  Little Bread Toddler loved the filling so much, he ate the filling right out of the dough, leaving a pile of empty sfiha doughs in his wake.  Since this recipe makes way more filling than the dough can accommodate, I sauted the rest of the filling and he happily at it out of a bowl with a spoon.

My recommendation? Make a double batch of dough and bake 48 of these since they go fast!