Sometimes there are recipes where I swear all reading comprehension has left me.
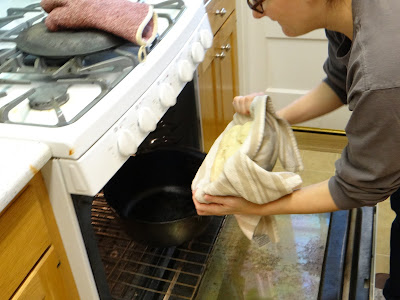
This Saturday I tried out the white bread from Preston Yancey's new book, "Out of the House of Bread," and it went so spectacularly wrong that I was tempted to give up my Bread Maiden card.
Despite messing up nearly every single step (and I did have the recipe right in front of me), the bread came out of the oven beautiful and tasty, and I learned a few new techniques that I might use in the future.
There's a reason I recommend making the same recipe at least three times. Now that I have a better sense of his method, it'll be faster and easier for me to make again, and next time hopefully correctly!
I can already see a "The Science Behind..." post, and a book review post from this book. I'm not sure it was meant to be used for Lent, but I'm following it during Lent and so far I've really been enjoying it. There is just something about bread baking that is deeply spiritual for me, and even though my first attempt at this recipe was a huge flop, I almost like that better than if it had been an immediate success - I've had to slow down and pay more attention.
Here's the recipe. His is much more detailed, which may be part of the reason I got so tripped up following his instructions.
You will need:
8 1/4 cups all-purpose flour
3 cups warm water and another 1/4 cup
2 1/4 teaspoons instant or active dry yeast or 1 packet
1 tablespoon sugar
1 teaspoon honey
1 tablespoon salt
1 tablespoon oil or other neutral oil
1. In a very large bowl, mix together your flour and 3 cups water. Cover the bowl with plastic wrap and let sit for 15 minutes.
 |
| this was fine. |
 |
| Here is where I realized my mistake with the boiling hot water - it had triggered starch gelatinization instead of gluten formation. The dough was incredibly gummy. I tried to make it work. |
 |
| As you can see, the gluten is not forming a nice, strong net because the water is caught up in the starch molecules and there's none left over to make gluten. |
 |
| after about 100 stretch and folds, the gluten is finally starting to form. |
5. Prepare your couches. Take two clean cotton kitchen towels (NOT terry cloth) and rub a bunch of flour into them. Remove your dough from the refrigerator, divide into two boules, and place each boule seam-side UP in each mixing bowl. Cover and let rise another 1.5 hours on the counter.
6. After an hour, preheat the oven to 500 degrees F with a cast iron dutch oven inside. Preston has detailed instructions about what to do if you don't have a dutch oven.
7. When your bread is ready, take the lid off the dutch oven and gently upend your dough into the dutch oven from the couche.
Using a razor blade or serrated knife, cut three deep cuts into the top to score it, return the lid, and bake for 15 minutes.
8. After 15 minutes have elapsed, turn the oven down to 450 and bake another 15 minutes.
9. After 15 minutes at 450 degrees F, remove the lid from the dutch oven and continue baking until the bread crust is brown and quite hard, another 15 minutes.
10. Remove from the oven and let cool to room temperature or overnight. The bread will keep best if you wait to cut it until you need it. Or follow my storage tips here.
 |
| When my loaf came out like this, I could not believe my luck. They looked absolutely perfect, despite my royal screw-up. |
However, the results of my scalded flour mistake were clear as soon as I cut into my loaf. There were absolutely no holes where yeast had been trapped by gluten. That said, due to the gelatinization, the crumb was incredibly soft. In the future, I may do a variation of Peter Reinhart's epoxy method by having one half of my dough autolyse with warm water and the other half with scalded flour so there is gluten formation and a super-soft crumb. Apparently scalded flour is a baking technique they use in Japan. And I thought there was nothing else I could learn in bread baking!
I also liked the three tier baking process of 500 degrees x 15 minutes lid on, 450 degrees x 15 minutes lid on, 450 degrees x 15 minutes lid off. It resulted in great oven spring and crusty crust.
Stay tuned, as I try this recipe again and learn to work with it.


1 comment:
This time everything that could go wrong did go wrong. I'll be interested to see your result the next time you make it. Hopefully, the loaves will be just as beautiful!
Post a Comment