Saturday, January 5, 2013

Rosca de Reyes Part II: Three Kings' Buns!


I love making bread for the kids I teach at Sunday school because they love it and it gives me a chance to bring a little more of the daily life and traditions surrounding the Biblical lesson into the classroom.

The older I get, the more interested I am in the customs and habits of the people in the Bible.  They seem more real to me when I think about foods they might have eaten.

For example, I made challah, as well as unleavened challah, to teach the kids about the Israelites' escape from Egypt.  Ok, so it wasn't technically matzo, but the kids really understood the lesson more deeply by seeing what unrisen bread looked like and could feel and taste it.

I also like exploring the way different people around the world celebrate the same holiday in different ways.  This Sunday is Epiphany, or Three Kings' Day, which depending on your brand of Christianity either celebrates the day Jesus was baptized or the day the three Wise Men came to visit the baby Jesus.  Regardless of faith, people often celebrate by eating a Kings' Cake or Bread with fruit and nuts.  Any holiday that involves food is a holiday I can support.


Traditional King Cakes have a fun surprise- little trinkets or beans are hidden in the dough before it is baked, and are said to bring good luck to those who find the trinket in their piece.

One of my first posts on this blog was a Rosca de Reyes, a typical Mexican Epiphany bread.  While the recipe I ultimately used was a Chilean Christmas bread, I really enjoyed seeing the parallels.


Since I was making this bread for my Sunday School class of 5-10 year olds, I decided to make Rosca de Reyes buns so each kid would get the same size piece.

I slid a whole almond into each one.  Shhhh... I'm going to tell them I only put an almond in one of the buns.  That way they will be surprised when they all find one!

For the full recipe, here is my post from a few years ago.  Check out the sweet paint color in my Austin kitchen.  I miss that place.  It only took an hour for my cold butter to hit room temperature.  In January.


Once you get to step 8 (let the dough rise 1 hour), head back over here to find out how to make the Rosca buns!

For this part, you will need:

2 egg yolks
candied lemon (optional)
coconut flakes (optional)
Butter for greasing your baking sheet or parchment paper
15-20 whole raw almonds (can also be blanched)

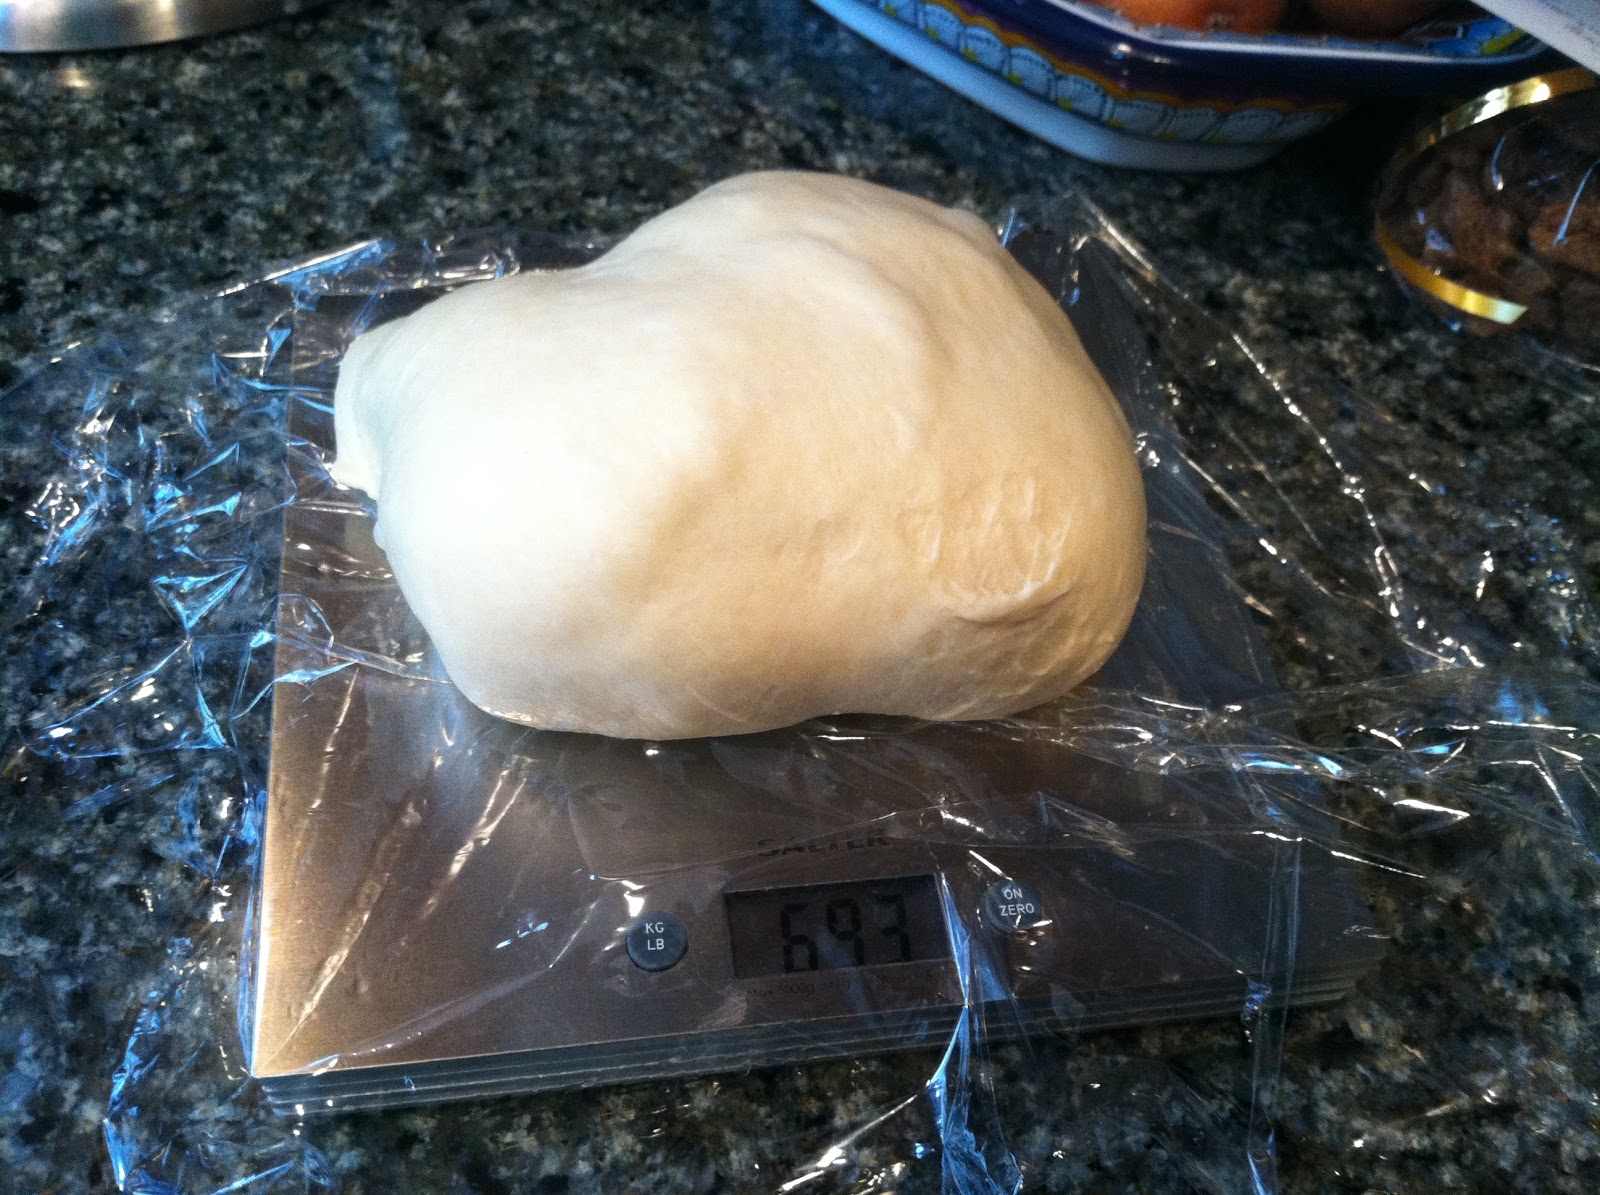
 1. When your bread has doubled in volume, punch it down and weigh it using a kitchen scale.  I wanted buns about 80 grams in weight, and based on my calculations I would get 17 buns.  That seemed like a good number.

2. Cut each piece to the desired weight.  This dough is extremely sticky so you will need wet hands which you will want to wash frequently since the dough will want to stick to them and make a mess.  Transfer each ball to a greased baking sheet.  Preheat the oven to 375 degrees F.

3. Let the buns rest for about ten minutes before reshaping.  Count out your almonds and lay them next to your baking sheets.  Your hands will be sticky and you won't want to reach into the bag with sticky hands.

4.  With wet hands, gently tuck an almond under one or all your buns, pulling the dough from the sides of the bun down and around the almond so the top of the bun becomes smooth.  Return to the baking sheet and cover with plastic wrap.


5. Once the buns have risen for about half an hour, you can decorate them.  I used a yolk wash, candied lemon peel, and dried coconut flakes.


Just take two egg yolks and mix them together to make the yolk wash.  Couldn't be easier.

6. Press the candied lemon peel into the buns, then cover with the yolk wash.


I also added the coconut flakes to some of them.  I thought that would add a festive touch.  Since I'm guessing most of the kids in my class do not like coconut, I left most of them plain.  If I make them again for a party, I will probably put coconut on all of them.


7. When the oven is ready, bake them for about 20 minutes, rotating them at 10 minutes. 


8.  I was a little confused because this bread was soft when it came out of the oven and didn't "thump" like my breads usually do.  But they are done, don't worry!

This picture is funny because it looks like I lined them up from lightest to darkest.  The two buns in the bottom right corner are the ones with coconut.

The verdict?  These are GOOOD.  I haven't made them since 2009.  I think this could become an Epiphany tradition for me. 

Thanks for looking and happy baking!


Friday, December 28, 2012

Baking With a Purpose II: Honey White Bread


As I wrote about in my last post, I recently started baking bread for communion at my church.  We do communion on the first Sunday of the month, so it is a pretty low-key commitment.  I make one loaf for the pulpit for the pastors to break apart ceremonially, and one for the congregation to actually eat.  I have done it twice so far, and learned a lot.

Most important being: the softer the better.

The first time I prepared bread for communion, I brought a sourdough.  Not only was it tough, the sourdough starter taste in miniature made it tasted stale.  

So the second time, I made Ina Garten's Honey White Bread from her book, Barefoot Contessa at Home.  I got this book as a Christmas present and even got it signed by the domestic goddess herself!  I love this bread and make it a lot because it is delicious and easy.

I doubled the recipe because I knew my family would be clamoring for some too.  

For two loaves, you will need:
 

  • 1/2 cup warm water (110 degrees)
  • 1 package dry yeast (Ina calls for two packages but that seems like WAY too much)
  • 1 teaspoon sugar
  • 1 1/2 cups warm whole milk (110 degrees)
  • 6 tablespoons (3/4 stick, or 86g) unsalted butter, melted and cooled
  • 1 1/2 tablespoons honey (I usually just eyeball this)
  • 2 extra-large egg yolks (save one egg white to brush on top of each loaf before scoring and baking)
  • 5 to 6 cups all-purpose flour
  • 1 tablespoon kosher salt
1. In the bowl of a stand mixer, pour in the warm water and sprinkle the yeast and sugar on top.  Let sit for about five minutes until it is beginning to bloom and smells yeasty.


2. Add the milk, butter and honey and stir with the paddle attachment until blended.
 3. Add the eggs, three cups of the flour (one at a time), and the salt.

4. Once the three cups of flour are blended in, switch to a dough hook and add the next two cups of flour gradually.  You are looking for the dough to start pulling off the sides of the bowl.  This means the gluten is beginning to form and the dough wants to cling together.


5. Depending on the weather, you might need just five, or more than six cups of flour!  Be patient.


6.  Bingo.  Now let the mixer knead the dough for about eight minutes.  During this time you will want to pull out a large bowl and pour two tablespoons of olive oil.  Set aside.  Do some dishes or something.

7. Once your eight minutes are up, remove the dough from the stand mixer bowl and form a ball with your hands, wrapping the ends of the dough under so the top is  a smooth surface.


8.  Place in a large bowl with two tablespoons of olive oil and flip to coat the whole surface of the dough.  Cover with plastic wrap and a towel and put in a warm place to rise for an hour.
 

9.  When dough has doubled in size, weigh it and cut the loaf in half.  You don't have to necessarily use a kitchen scale, but it insures the loaves bake evenly because they are exactly the same size.


10. Let the dough rest for a few minutes while you butter two bread tins. 
 
 11.  Roll up the two dough halves like jelly rolls, pinch the ends closed, and place in the pans seam side down.  Cover with plastic wrap and let rise another 45 minutes.


 12. At some point during the second rise, you will want to preheat the oven to 350 degrees F.  When the dough and the oven are ready, brush the egg white over the top of each loaf, then score it across the top with a sharp knife.  Place in the oven and bake for 40-45 minutes.


The circle loaves are for the pastor to hold up during the service, so I wanted them to be pretty.  The loaves baked in the bread pans will be either eaten by my family or the congregation.
 

The scoring pattern looks especially pretty because the bread is baked at a low temperature.  It doesn't explode open like a bread baked at, say, 450 degrees F.  This is going to look great on January 6.  Until then I will freeze it in a ziploc bag.

Thanks for looking and happy baking!

Saturday, November 3, 2012

Baking with a purpose


 Most of the time, I bake bread for selfish reasons.  I bake for my family and friends primarily.

But not today.  I mean, ok, it is for friends, but it's more than that.

I'm baking communion bread for my church, Commonwealth Baptist Church.

Now, don't worry, this isn't going to be a super religious post.  I'm not really that religious anyway.  If you want to skip the next few paragraphs, scroll down past the line to get to the recipe.

But it is about gifts, spiritual and otherwise.

Right now at my church, I give a financial offering, I pick up and drop off one of the teens in our Sunday School program, and I help teach Sunday School.  These are things I do for the church, but I don't think of them as things I am naturally called to do.

The bible talks about gifts provided by the Holy Spirit.  In our church we believe that these spiritual gifts translate into natural abilities or interests, and that they can help guide church members to give back to the church in their own way.

I am not gifted financially (ha!).  I definitely don't feel like I have the gift of teaching.  I feel super awkward around kids, I don't know all the tricks to make kids listen to me, and often my lessons and activities fall flat.

And I'm not the best baker ever.  But I love it.  And this love has inspired me to keep baking through all the failures, to the point where I may not have "natural" ability, but I do have ability.  Baking calms me down, it makes me feel accomplished, and it's something that I can share with others.  When I couldn't bake, I really missed it. 

I inquired two years ago about baking bread for communion but was told that there was another church member who included among her many contributions providing communion bread and had done so for many years.  A few weeks ago, I got word that this member was getting tired of doing it, and had delegated to the other leaders in the church to alternate bringing bread each month.  I saw my chance and asked the pastors if I could take on this responsibility.

So for my first attempt, I decided to make a basic sourdough.

---------------------------------------------------------------------

This recipe is loosely based on the 1-2-3 sourdough method, although I didn't want to make it super sour.  I used commercial yeast and sourdough starter.

SOURDOUGH FOR COMMUNION BREAD


You will need:

375g of all-purpose and bread flour (about half and half of each)
250g of water, cold or lukewarm
1 tablespoon sourdough starter (optional)
1 teaspoon of commercial yeast
7g of salt

You will also need:
1 large bowl
a kitchen scale
a dutch oven with a lid
parchment paper

1. Mix everything together in a large bowl just until the flour and water are completely incorporated.  Let it sit for about 10 minutes, then gently form into a ball. 


2. Cover with plastic wrap and a towel and let sit overnight.


3. The next morning, you will find this:


4. Re-form into a ball by tucking the loose dough underneath so the top becomes a smooth surface.  You will notice that gluten has formed overnight, even though you didn't do any kneading whatsoever.


5. Cut one large square of parchment paper and set your loaf on top.  Cover with plastic wrap and a towel and let rise a second time, for about 45 minutes to an hour.


6. Preheat your oven to 450 F and put your dutch oven in the oven to warm up.

7. When the oven is ready, remove the plastic wrap from the dough and, using a sharp knife, score the top of the loaf.  Place the loaf and the parchment paper in the dutch oven, replace the lid, and bake in the oven for 25 minutes.


8.  After 25 minutes, remove the lid and bump the temperature down to 400.  Bake another 15 minutes or so, until the bread is hard and unyielding when you tap it with your fingernail.  Remove the bread from the dutch oven using the parchment paper and let it cool.


 9. Slice into tiny pieces and stick in a plastic zip-top bag.  Deliver to church on Sunday morning.


I will let you know how this goes!  I may try different breads like challah or honey wheat to mix it up.

Thanks for reading!

Wednesday, June 13, 2012

Banana Bread with Fresh Cherries


The farmers market in Del Ray has been wonderful for the past few weeks.  Tons of berries, gorgeous tomatoes, and beans!  I haven't been able to resist buying a few pepper plants, and gerber daisies to put in the garden as well. 


Cucumbers... from a long ago garden!


Little Bread Toddler helps me by picking the heads off the flowers and pulling up everything I've just planted.  But that's just the reality of life with a toddler.  That said, I can't help but melt when he runs over to the sugar snap pea plants and excitedly asks "peas? peas?" until I pick one off and give it to him.


Anyway, last Saturday I bought a ton of fresh cherries.  I had been thinking about what to do with some past-their-prime bananas, and I had the idea of making banana bread, and throwing in some cherries just to spruce it up a little. 

Did you know you can throw bananas in the freezer and they will keep? It's true.

I got this recipe from this website: http://www.ahastylife.com/2011/03/banana-bread-yes-it-is-low-calorie.html. 

However, I made a few changes, one of which was the addition of cherries.  I also used brown sugar instead of regular white sugar, and threw in a handful of rolled oats.

You will need:


1/4 cup sugar (white or brown)
2 Tbsp butter, melted
1 large egg, beaten
1/4 cup unsweetened applesauce (a generous 1/4 cup)
1 cup ripe bananas, mashed (3 small)
3/4 cup all-purpose flour
1/2 cup whole wheat flour
1/2 tsp baking soda
1/4 tsp salt
1/2 cup cherries
3 tbls rolled oats

1. Preheat oven to 350°.
2. In a large mixing bowl, combine melted butter, sugar, egg, and applesauce.

  3. Fold in the bananas.
4. Lightly spoon the all-purpose flour and whole wheat flour into dry measuring cups, and level with a knife. Combine the two flours, baking soda, and salt in a separate large bowl.

5. Add the flour mixture to the banana mixture, 1/2 cup at a time, mixing after each addition until moistened.  Add the oats and cherries right about now as well. 

6. Coat one loaf pan with cooking spray. Pour the batter into the loaf pan.


7. Bake at 350° for 50 minutes to 1 hour, or until a wooden pick inserted in center of the bread comes out clean.

8. Allow the bread to cool in the pan for 5 minutes. Remove the bread and cool completely on a wire rack.


 So, obviously this bread is not the prettiest thing out there.  If you did manage to swing by A Hasty Life, her results were much prettier.  But it IS tasty!


Little Bread Toddler approves.  I've been microwaving it and spreading butter on it for breakfast, but it's also great on its own.  A solid recipe!