Wednesday, February 29, 2012

Banana Bran Muffins


This is a recipe I used to make a lot five years ago, when we lived in Del Ray after graduating college.  It was our first place where Mr. Bread Maiden and I lived together.  We got engaged and married while we lived in that townhouse on Nelson Avenue.  We also realized we never wanted to live with roommates again!

Sorry, where was I?  Oh, yes.  Banana bran muffins.

These muffins are super easy and healthy.  I don't like things to be too sweet, so you can add more sugar than the recipe calls for.  Me? I like to slather them with peanut butter for a healthy (and filling) breakfast.

What you need:

1 cup wheat bran flakes
1 cup mashed banana (I learned a neat trick making these this time: you can take underripe bananas, freeze them, then when you thaw them the insides are all mushy.  I found two bananas makes about a cup)
3/4 cup plus 2 tbsp milk
1/2 cup brown sugar
1/4 cup canola or vegetable oil
1 egg
1 1/2 cups whole wheat flour
1 tbsp cinnamon
1/2 tsp salt
raisins (this time I used currants)

I took a picture with the baking soda, then realized there's no baking soda called for in the recipe.  Sorry.


1. Preheat the oven to 375 degrees F.  You will want to butter a muffin tin right now as well.  In a large bowl, mix the bran, the bananas, and the milk.  Let the mixture sit for five minutes.


2. Add the brown sugar, oil, and egg to the bran mixture.


3. In a medium-sized bowl, mix together the flour, baking powder, cinnamon and salt.
 

Add the dry ingredients to the bran mixture, and mix just enough to combine. 


Throw in as many raisins or currants as makes you happy.


4.  Scoop into the muffin tin, and bake for 30-50 minutes until the muffins are golden brown.


Sorry the time is so variable; the recipe I have calls for 20 minutes of baking, and when I took them out they were nowhere near done.  So I kept setting the timer for 2 and 3 minutes each time until they were finally done.  They will set and be golden brown, just be patient!


Little Bread Toddler loves these muffins too.  Here I am trying to get a close-up of the inside of the muffin.


Verdict: these are really, really easy to make, and healthy to boot!  This is a recipe that I'm going to have to bring back into my baking repertoire. 


Wednesday, February 22, 2012

My Favorite Quiche Crust Recipe


This is my favorite recipe for quiche crust.  It's just a pie crust, and you use a food processor so it couldn't be easier.

You will need:

2/3 cup plus 6 tablespoons all purpose flour (157 g)
6 tablespoons butter (82 g)
2 tablespoons lard or shortening (28 g)
pinch of salt
a few tablespoons of ice water
parsley (optional)

1. Measure out your butter and lard into a bowl and put in the freezer to get it cold.


2. Take your food processor.


3. Pour in the flour and salt and pulse to combine.  Take your cold butter and lard and add it to the flour.  At this point you can also mince up some fresh parsley and add it too.  Pulse until it forms small crumbs.


4. Add the ice water, a spoonful at a time, pulsing between each addition. The dough will slowly come together.  First it will look like this, but keep adding more water.


5. You want it to look like this.


6. If you can take your fingers and squeeze it into a dough between your fingers, it's ready.  Pour the dough out onto your countertop and form into a ball.  Cover tightly with plastic wrap and refrigerate for about 30 minutes.


7.  Take your dough out of the refrigerator and remove the plastic wrap.  Using a rolling pin, gently roll the dough out.  You don't need to roll it thin; you will use your fingers to spread the dough into the pie pan.


8.  Gently move the dough to a greased glass pie pan.  Using your fingers, push the dough out and up the sides of the pan.  Cut off any overhanging pieces.  Cover with plastic wrap and refrigerate while you preheat the oven to 435 degrees F.


9. Take the dough out of the fridge and remove the plastic wrap.  Poke the dough a few times with a fork.  Place a piece of parchment paper over the dough and fill with uncooked beans or rice.


10. Bake the crust for about 7 minutes, then turn the oven off, remove the parchment and beans, and let the crust sit in the oven to dry out until you are ready to fill it.


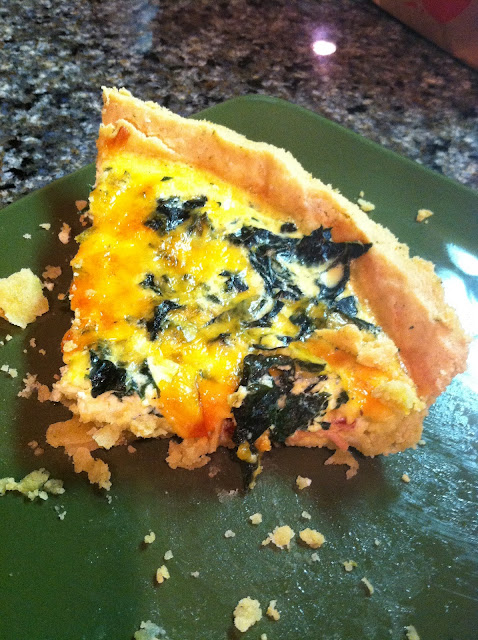
11.  Meanwhile, mix up your filling.  We used kale and bacon, but you can use anything with this all-purpose crust.  We like Julia Child's basic quiche recipe, shown here.  Bake for about 30-40 minutes, depending on your oven.


12. Nom nom.  Delicious!  This crust is so basic that you can use any filling, and you can spice it up with spices, herbs, or other seasonings.