
Tuesday, November 1, 2011

Puff Pastry


I don't watch a ton of Food Network anymore. It's not that the shows aren't entertaining; they are.


But I feel like I've outgrown it.


Back when Mr. Bread Maiden and I were dating, I didn't know how to cook. And I certainly didn't bake.

He introduced me to Alton Brown, nerdy food-scientist. And from there, a food journey began.


But I'm so bored by the offerings now, and often disappointed at the results. Not to brag, but Mr. Bread Maiden and I often cook and bake food that looks better than what these celebrity chefs make. And I'm left wishing that they would, just a little, EXPAND my kitchen knowledge.

Like they did before.

There are still tons of things I've never made before.

Like, most world cuisine. I dunno, casseroles. Profiteroles. Sole. Mole. Lots of things!

One of those things is puff pastry.

Food network appears to not want to touch the stuff with a 10-foot pole.

This is my search for puff pastry on food network.


Hey, Ina Garten has a recipe for puff pastry; that looks promising.


But the recipe calls for frozen puff pastry.

A recipe for real, homemade puff pastry isn't until page 2.

Friends, this is a shame.

Because, as Mr. Bread Maiden and I learned on Sunday, homemade puff pastry is DAMN TASTY.

I used this recipe, from White on Rice Couple.

You will need:

Butter Block Ingredients
1 lb + 3 1/2 T (510g) cold unsalted Butter
2 t (10ml) Lemon Juice
pinch of Salt
1 c (130g) Bread Flour

Dough Ingredients
3 c (400g) Bread Flour, approximately
3 1/2 T (55g) soft unsalted Butter
2 t Salt
1 c (240ml) cold Water

Make Butter Block

1. In mixer w/ paddle attachment, work butter lemon juice, salt, and flour into a smooth paste.

2. On a sheet of wax paper, roughly form an approx. 6″ square with the butter block mixture. Lay another piece of wax paper on top and smooth out the square & straighten the sides. Peel back each wax paper sheet & re-lay as it wrinkles to keep a smooth, even surface. After block’s thickness & sides are even, refrigerate until firm.


Make the dough


1. Sift flour onto your work surface. Cut the butter into the flour until it looks like course crumbs.


2. Now it’s kind of like making fresh pasta. Shape into a mound, then make a well in the center of the mound. Add the salt & cold water into the well, then with a fork, use a whisking motion to gradually incorporate the well’s sides into the water.


When it starts to form a solid mass, finish incorporating the flour by kneading. Incorporate just until it is still sticky and has a rough texture. Adjust the water & flour as needed. Try to knead as little as possible. Puff pastry likes a lazy kneader.


3. Form dough into a ball, remember-knead as little as possible.


Flatten the ball a bit, then cut a cross halfway through the dough. Wrap it up in plastic wrap & let rest in fridge for 30 minutes.


You’ll want the Butter Block to have approximately the same consistency as the Dough, after the dough is rested.


You don’t want the butter rock hard, but not mushy soft, either. A dough that is softer than the butter will stretch while the butter doesn’t. If the butter is softer than the dough, it will be pushed out the sides. Either suck to some degree. You may have to adjust chill/resting times for either dough or butter block so they are about the same. Kitchen temp., how long it took to make the dough, fridge temp., all affect the consistency of the Butter Block & Dough. Figure out adjustments to make so they’ll work together homogeneously. It may take a time or two, but you’ll get the hang of it.

Assembly

1. Pull the corners of the cuts out of the dough ball to make a square shape. Roll the dough out to a square slightly thicker in the center than on the sides, and slightly larger than the butter block.


2. Place the butter block diagonally on the dough square, so that the butter corners are pointed at the middle of the dough sides. Fold the uncovered dough corners over the butter block to completely envelop the butter. Pinch the seams tightly together to seal in the butter.


3. Dust your work surface with flour, and roll the dough into a rectangle about 1/2″ thick. Remember to keep dusting with flour whenever needed to keep the dough from sticking & tearing the layers.

4. Size up your rectangle visually into 3. Fold one third over the middle, then fold the opposite third over. Just like a tri-fold brochure. Try to have everything as even as possible. All the edges should match fairly closely. Put on a plate, cover, and refrigerate for about 30 minutes.


5. Roll out to 1/2″ thick and repeat the fold. Don’t forget to flour as you roll. Plate, cover, and refrigerate for 30 minutes. Repeat this for a total five roll & folds.


6. After the last fold, roll the rectangle out to about 3/4″. If it is difficult, put dough in the fridge for a bit to relax the gluten. If using immediately, cover, rest in fridge for about 30 minutes, then use as needed. If it’s for later, cut into sections big enough but that still fit easily in your freezer (usually just in half), layer with wax paper between sections, freezer bag it, & store until needed.

7. If you're going to bake it now, roll out the dough pretty flat and cut into triangles.


8. Roll up the triangles and smear with egg wash.


9. Throw them in an oven preheated to 425, for about 10-15 minutes until golden brown.


Lordy lord.


These are amazing. SOOO tender and flaky. They almost fall apart they are so flaky. Butter oozes out of these and they were incredible warm from the oven. Mr. Bread Maiden, who initially wanted to use the puff pastry for a Beef Wellington, immediately changed his mind in favor of more croissants. While it was definitely time-consuming, I think I would make puff pastry again. Maybe next time I will double the recipe so I can freeze one and use one. I can already see uses for this dough: pies, croissants (of course), strudels, pot pies. Stay tuned.

Tuesday, September 13, 2011

Carrot-Apple Sauce-Banana Bread


The description of this loaf on grouprecipes.com says it all:

"This moist bread combines banana and carrots for a different take on a lowfat banana bread."

We make banana bread. We make carrot bread. The ingredients for each are basically the same. Why not combine the two?

I heartily agree.

I've been experimenting with healthy bread recipes that Mr. Bread Maiden and I can enjoy, but can also double as teething biscuits for Little Bread Baby.

My first recipe was the Crunchy Teething Biscuit Recipe.

I must not have baked it for long enough, because by the time it had fully cooled, it had sunken in the middle and was still quite wet and mushy.

Even so, with the second baking, they firmed up and LBB loved them. I even made little french toast sticks with them.

So this time around, I picked just a regular bread recipe. This One.

I had carrots and bananas on hand, and made quick work grating an apple for the applesauce.


Then I added the two eggs to comprise the wet ingredients.


Mix up the wet ingredients.


Now on to the dry ingredients.


Oops! What is that baking powder doing in the picture? I never used baking powder.


There, that's better.

Mix up two cups flour and one cup of sugar. I did one cup each of Whole Wheat and AP flour. Next time I think I'll cut way down on the sugar.


For some fun, I threw in some freshly-grated nutmeg.


Whisk the flour, sugar and nutmeg together with the salt and baking soda.


Now bring the wet ingredients and the dry ingredients side by side.


And mix the dry into the wet, a little at a time, with a spoon. Don't stir too much!


Now pour into a greased bread pan and pop in a 350 degree oven for about an hour.


Pull it out and let it cool.


Yummy.

But you aren't done yet!

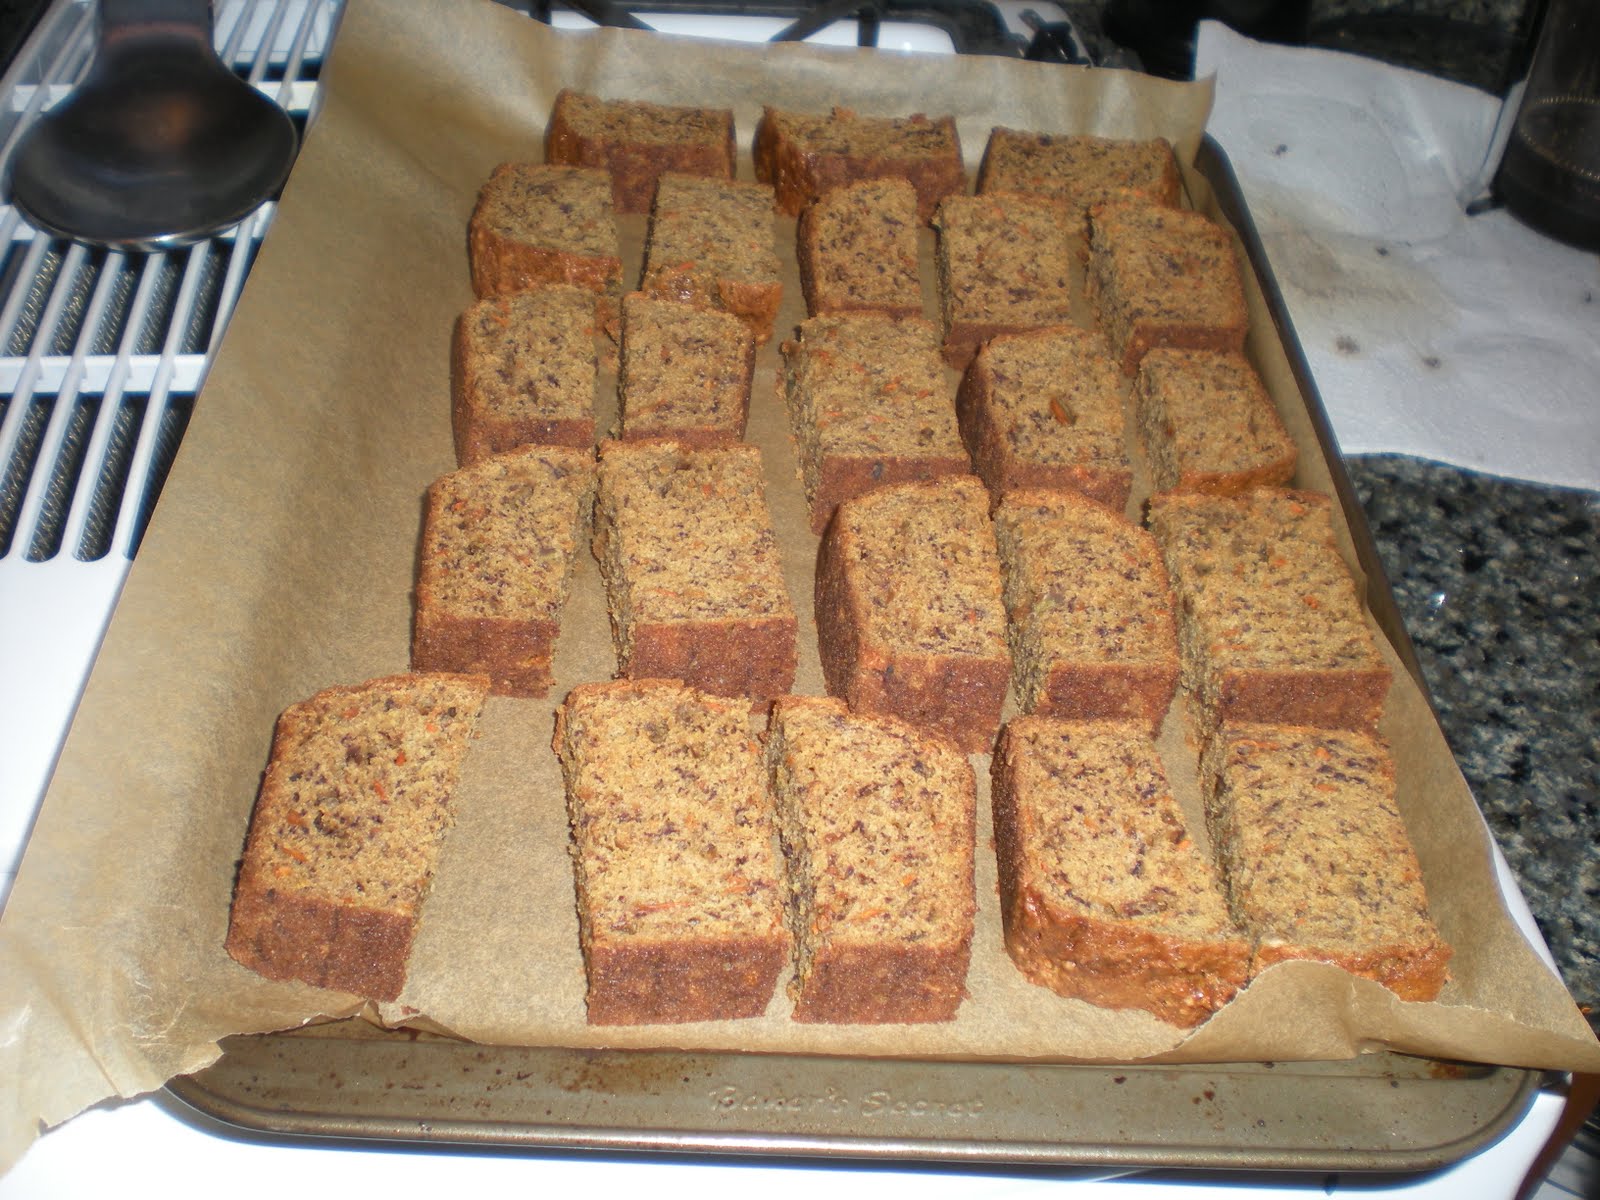
Once the loaf is completely cool, slice it into 1-inch-thick slices.


Then divide each slice into thirds.


Place the pieces onto a baking sheet lined with parchment paper.


Bake until they are a little dry and crispy, about 20-30 minutes.

Once they are cool, enjoy! These taste really good (probably because of all the sugar). LBB ate one already and loved it.

You can really do this with any bread. Just slice it already-baked bread and bake at 350 until it has the consistency of biscotti.


What, you didn't know biscotti just means "twice-baked?"

Maybe if I call these "biscotti" instead of "teething biscuits" my baby will become a little foodie.


Or not.

Saturday, August 27, 2011

Arlington County Fair


The Arlington County Fair is an annual summer tradition for Mr. Bread Maiden's family. Every year I have known them, they've gone for the great fair food and a little light-hearted competition.


Mr. Bread Maiden's mother, my mother-in-law, aka Slow Learner, has for the past few years submitted various homemade confections like bread and jam, as well as home-grown vegetables to be judged. However, until this year I've been in Williamsburg, or Texas, or Argentina, or just busy, or suffering from terrible morning sickness, all of which prevented me from entering my bread in the competition.

That all changed this year, when I finally decided enough was enough. I was going to get off the sidelines and participate.

I had to strategize.

Over the course of this blog, I've documented many different types of bread. But what was attractive and tasty enough to submit?

I decided that I would submit my tried-and-true breads: my sourdough,


honey whole wheat,


and kugelhopf au lard (bacon bread).


I had the plan of making four loaves of each type of bread, and picking the prettiest loaf to submit. But in hindsight that was just too much work for my first competition.


The way it works is that each class (such as yeast bread, whole wheat bread, specialty bread, etc.) has a first and second prize winner, then the top winner of each category is in the running for a category-level prize, such as reserve champion and champion. Those champions are in the running for a department-level prize, the grand champion and grand reserve champion.

Here's how I did.


I won two first place class ribbons and one second place class ribbon. And the breads that won each ribbon:


I was please at the results. And that second place ribbon? I was happy to relinquish first place to my mother-in-law, Slow Learner! I can attest that her whole wheat was lovely and delicious.

What I really liked about the judging was that they left comments. I will definitely keep those in mind when I enter bread next year.


If you can't read them, from left to right they say:

Sourdough: Nice presentation and texture, light, slightly undercooked?

Kugelhopf au Lard: Interesting Loaf. Done well- creative.

Honey Whole Wheat: Good appearance, aroma, flavor, liked honey-wheat flavor, good texture. Perhaps a little under-cooked (little doughy).

Wait a second.

Hold the phone.

Close-up on the sourdough.


Now, close-up on the comments section.


I was almost reserve champion??


Ah well. Maybe next year.

Monday, May 23, 2011

Whole Wheat Challah


Friends, I'm really excited about this one.

For the past few months, I've been making loaf upon loaf of 1-2-3 sourdough.


It's tasty and extremely convenient. All you do is get the starter going, mix the starter with flour, water and salt, stretch and fold once, shape, and bake. Super easy.

But sometimes you want a bread with more substance. Sometimes you need that nutty whole wheat goodness.


Which (not to sound like an ad) is when I reach for Peter Reinhart's Whole Grain Breads book.


I was interested to learn this week that a bunch of bloggers are going to be working through Peter Reinhart's Whole Grain Breads, baking and posting about each recipe.


In that spirit, I flipped past the multigrain struan, basic whole wheat, transitional wheat, and honey wheat that are favorites in our house. I wanted to try something different.


So when I stumbled upon the whole wheat challah, I figured I would try it out.

I mixed up the biga and soaker the night before.


What makes this bread a challah is the use of one egg and four egg yolks in the soaker!

The next morning I placed the soaker on top of the biga and used my pastry cutter to cut it into small pieces.


then I added the other ingredients.


The great thing about Whole Grain Breads is that it's a book about a single technique. All the recipes follow from that technique. So once you get it, then the recipes get a sort of rhythm.


As I was making this dough, I could anticipate the next step and knew what it was supposed to look like in each stage of the process.


This time, I chopped the dough into three sections after the first rise in anticipation of making a challah braid. It could just as easily be shaped into a boule or baked in a loaf pan.


After the second rise I brushed the loaf with egg wash and put in the oven.


I can't believe I didn't take a picture of the finished product!


But the amazing thing wasn't how it looked.

It sliced like an absolute dream. So soft. And for taste buds that had been getting AP flour loaves with just a touch of whole wheat flour thrown in, the flavor of the whole wheat challah was gloriously dense and satisfying.


I will definitely be making this recipe again. And I think I'll try some of the other recipes in Whole Grain Breads too.