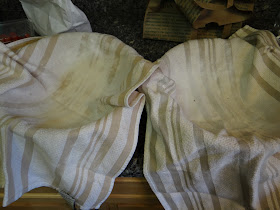
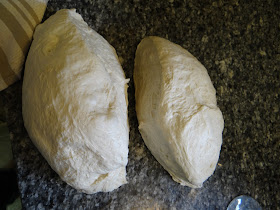
This is my third time making Preston Yancey's white bread recipe from his latest book, Out of the House of Bread. Over the course of the book, you follow various practices related to spiritual disciplines and make the same white bread nine times.
Nine times! Besides my 2-3 white bread, and my challah recipe from the Joy (which I use to make my church's communion bread) I don't think I've ever made the same recipe nine times.
I've been documenting my thoughts on my experiences baking this bread for a later post, as well as what I've learned through the process of baking the same bread nine times.
First, a disclaimer: I know Out of the House of Bread isn't a baking book. It's a spiritual practices book, which is why I've included it in the baking and theology section of my Bread Library. I hope nobody takes this as a criticism of the book or of the author. There is a lot to like about this recipe, and as a result I'm adding some of my own knowledge formed from years of baking bread in an effort to make it my own. I hope he would not have a problem with this.
For now, with two attempts under my belt, I thought I would try and correct some of the issues I've had making it, while retaining the things I like about the recipe.
Issue #1. Tight Crumb. This is the crumb:
Very small holes. One of the things I really like about this bread is that it bakes to have a very crusty crust. Most crusty breads have a very airy crumb with big holes. So it was almost jarring for me to cut into this bread and see such a dense crumb. I'd like to correct this.
Issue #2. Lack of flavor. The first time I made this bread, my father-in-law remarked that it needed salt, and I definitely agreed. One tablespoon is just not enough for two large loaves of bread, at least not for me. So the recipe (in my opinion) is under-salted. It also rises for a very short time, meaning it could benefit from longer fermentation to develop better flavor.
So this time, when I made this bread, I did something I should've done the very first time: I weighed my ingredients. That way, I could calculate the hydration of my dough and see if I could tweak it a little bit. If the bread had a low hydration, adding more water would result in bigger holes in my dough and a lighter, airy crumb.
As I suspected, the hydration of the dough was very low- only about 59%. I added an extra 1/2 cup of water, bringing the hydration up to 66%- more typical for a sandwich bread. I might try to go even higher next time.
Then, I remembered something that hadn't occurred to me before. Preston is baking in Texas, and I am baking in Virginia. I remember when we lived in Austin requiring less water than I do now to create the same dough conditions. So perhaps that is why his recipe doesn't use much water. This is easy enough to correct.
Secondly, after the autolyse period, I added an extra 1/2 tablespoon of salt and reduced the amount of yeast to 1 1/2 teaspoons. The increased salt will give the bread more flavor, and less yeast will give the dough more time to rise and ferment, developing better flavor as well.
Also, I've been adding the olive oil directly into the dough for two reasons. One, it acts as a preservative, lengthening the time the bread can go without staling, and two, I don't have the patience for steps that are unnecessary. If your gluten has formed properly, the dough should stick to itself and not to the sides of the bowl.
There is no reason to transfer your dough from a mixing bowl to a proofing bowl, plus it creates another dish to wash.
Finally, I feel compelled to once again swear that I do know how to read. There is something about this recipe that makes my brain not want to follow it. Maybe it's the fact that it's on a kindle, rather than a printed book. There is no excuse for the fact that over the past three baking sessions, not one time have I faithfully followed his recipe as written. Usually I discover that I've done something wrong as I'm glancing over the recipe one last time, mentally checking off all the steps. Then I realize, "D'oh! The couches go in the refrigerator!" or, "D'oh! the water was supposed to be warm, not hot!" It's frustrating.
 |
| before realizing I was supposed to divide the dough and put it into couches in the refrigerator |
Besides those tweaks, I proceeded with the recipe, just giving it a longer fermentation period to account for less yeast. Once it had doubled in size, I divided it and shaped it before placing it into two couches to give it a short rise in the refrigerator, then baked it using his 3-step process.
You will need:
1265g or 8 cups all-purpose flour
800g or 3 1/2 cups warm water
1 tablespoon sugar
1 tablespoon honey (yeah, I added more honey too)
1 1/2 teaspoons yeast
1 1/2 tablespoons salt
1 tablespoon oil
1. Pour your flour and about 720g of warm water into a very large bowl. Mix with your hand to combine. Don't worry if the dough is very dry. Let the dough sit covered for 15 minutes.
2. Meanwhile, mix together the other 80g of warm water with the sugar, honey and yeast. Let sit for 15 minutes.
3. Add the yeast mixture to the flour mixture, along with your salt and oil. Gently knead until it comes together in a ball of dough. Cover the bowl with plastic wrap and let rise for 4-5 hours, until doubled in size.
4. Place your dough in the refrigerator for 1.5 hours. Realize you were supposed to divide it into the couches before you refrigerated it.
5. Prepare two couches thusly.
6. Divide your dough.
Gently shape your doughs into boules, tucking the edges under the bread to form a smooth top of your dough. Pinch the edges together to form a seam, then place your dough seam-side up into your couche. Put it back in the refrigerator.
7. Place a dutch oven inside your oven and preheat the oven to 500 degrees F. When the dough is ready, turn it out into your dutch oven, then use a razor blade to make a series of deep cuts on the surface of your dough.
I have found it must easier to score your loaf using a razor blade when it's already inside the screaming hot dutch oven. This is because it cuts across the gluten strands much more easily than a serrated knife, which requires some momentum and a pulling motion straight across your loaf which is difficult and dangerous to perform under these conditions.
8. Put the lid of the dutch oven back on, and bake your loaf for 15 minutes at 500, 15 minutes at 450, remove the lid, and bake for the last 15 minutes uncovered.
9. Remove your loaf and let it rest for at least an hour before cutting into it.
I don't know if you can tell from the pictures, but these loaves are HUGE! I may further divide them next time into three loaves, because these are unlikely to fit in the gallon-size plastic bags I usually store my bread in. The size does validate my hypothesis- that increasing the hydration would result in larger holes and more oven spring.
And-- success! Look at those holes in the crumb!
The flavor still isn't what it could be, so I may cut the yeast even further and let it rise overnight. Other than that, I'm pleased with the improvements I made this time.
Have you attempted this bread yet? How did it do? Please leave a comment below!


WOW! Those are positively GLORIOUS! If they lack flavor, peanut butter will probably help (at least for someone who doesn't dislike peanut butter). I'll be interested to see what you do NEXT time!
ReplyDeleteThank you so much for posting this recipe hack. I have been having that tight crumb problem in my last 3 loaves and this week, using your tips and adjustments, my loaf is looking 2x bigger and much fluffier. This helped a ton.
ReplyDeleteHello again. I am following your blog with interest and it helps me to know where to begin. So this is the master white bread recipe that you work from. I have followed Jim Lahey's no-knead bread recipe and low-knead sourdough faster bread and have had numerous troubles and need a helping hand as I don't have a slow learner family member as encouragement. You mention that you might up the hydration and lesson the instant yeast. So here is the formula for the Lahey bread. 1 loaf recipe is easier and less to eat if a problem arises so I half the recipe, it's already rather big for me, as I start with 400g flour. He uses 75% hydration, 1/2% instant yeast, no sugar or honey added. Salt, yes one can always up the salt for flavor. I would like to give this a go so here is my adaptions. Did you adjust it maybe close to it? I have a lot of problems that my dough degasses as soon as I want to shape and fold it to go into the banneton stage. I used a percentage digestive bran or wholegrain if you understand that better and don't know if that is the problem. Let me know if this is ok, please. I will not add all 75% initially as a too wet dough to handle is my problem. Your speed with a bench knife would put Jim Lahey to shame. Handle the dough as little as possible comes best in view with your handling of the tartine country loaf video. Your recipe says: You will need: (1 am going to make 1 loaf, not 2, so half the recipe) 1265g or 8 cups all-purpose flour (632.5g) flour = 100%
ReplyDelete800g or 3 1/2 cups warm water (400g) 474.3g = 75% hydration 1 tablespoon sugar (0)
1 tablespoon honey (yeah, I added more honey too) (O) 1 1/2 teaspoons yeast (reduce 3/4 tsp yeast =3,6g) 3,16 = 0,005% (1/2%) 1 1/2 tablespoons salt (3/4 T = 11g) 1 tablespoon oil (1/2 tablespoon) MvdM