Most important being: the softer the better.
The first time I prepared bread for communion, I brought a sourdough. Not only was it tough, the sourdough starter taste in miniature made it tasted stale.
So the second time, I made Ina Garten's Honey White Bread from her book, Barefoot Contessa at Home. I got this book as a Christmas present and even got it signed by the domestic goddess herself! I love this bread and make it a lot because it is delicious and easy.
I doubled the recipe because I knew my family would be clamoring for some too.
For two loaves, you will need:
- 1/2 cup warm water (110 degrees)
- 1 package dry yeast (Ina calls for two packages but that seems like WAY too much)
- 1 teaspoon sugar
- 1 1/2 cups warm whole milk (110 degrees)
- 6 tablespoons (3/4 stick, or 86g) unsalted butter, melted and cooled
- 1 1/2 tablespoons honey (I usually just eyeball this)
- 2 extra-large egg yolks (save one egg white to brush on top of each loaf before scoring and baking)
- 5 to 6 cups all-purpose flour
- 1 tablespoon kosher salt
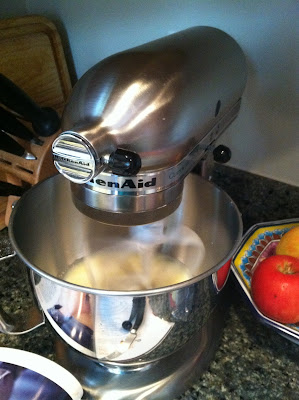
2. Add the milk, butter and honey and stir with the paddle attachment until blended.
3. Add the eggs, three cups of the flour (one at a time), and the salt.
4. Once the three cups of flour are blended in, switch to a dough hook and add the next two cups of flour gradually. You are looking for the dough to start pulling off the sides of the bowl. This means the gluten is beginning to form and the dough wants to cling together.
5. Depending on the weather, you might need just five, or more than six cups of flour! Be patient.
6. Bingo. Now let the mixer knead the dough for about eight minutes. During this time you will want to pull out a large bowl and pour two tablespoons of olive oil. Set aside. Do some dishes or something.
7. Once your eight minutes are up, remove the dough from the stand mixer bowl and form a ball with your hands, wrapping the ends of the dough under so the top is a smooth surface.
8. Place in a large bowl with two tablespoons of olive oil and flip to coat the whole surface of the dough. Cover with plastic wrap and a towel and put in a warm place to rise for an hour.
9. When dough has doubled in size, weigh it and cut the loaf in half. You don't have to necessarily use a kitchen scale, but it insures the loaves bake evenly because they are exactly the same size.
10. Let the dough rest for a few minutes while you butter two bread tins.
11. Roll up the two dough halves like jelly rolls, pinch the ends closed, and place in the pans seam side down. Cover with plastic wrap and let rise another 45 minutes.
The circle loaves are for the pastor to hold up during the service, so I wanted them to be pretty. The loaves baked in the bread pans will be either eaten by my family or the congregation.
The scoring pattern looks especially pretty because the bread is baked at a low temperature. It doesn't explode open like a bread baked at, say, 450 degrees F. This is going to look great on January 6. Until then I will freeze it in a ziploc bag.
Thanks for looking and happy baking!


