Painted bread tutorial. I will DEFINITELY be making this. Stay tuned!
http://cheftessbakeresse.blogspot.com/search/label/painted%20breads
▼
Wednesday, November 18, 2009
Saturday, November 7, 2009
I need to update more
Once again, I find myself so busy that despite all the time in the world to make delicious confections, I rarely find the time to sit down and blog about them.
1. The past few weeks I've been making up a few firsts mixed in with the tried-and-true. I've been making enormous batches of Reinhart's spent grain breads (detailed earlier) since Mr. Bread Maiden has been brewing up beer like a crazy person and we always have tons of spent grains left over.
However, I must've measured wrong because once I got to the fourth loaf, I was nearly out of grains! I decided to experiment and threw in flaxseeds, sesame seeds, dates, and raisins.
The dates were a challenge to keep in the loaf, but eventually they started to meld with the rest of the dough.
The bread turned out fantastic; almost like a cinnamon raisin bread but not as sweet.
2. I had a hankering for homemade pretzels after seeing so many people make them on the FreshLoaf. So I had to try for myself!
I didn't take many pictures of the process since it went so fast: we shaped them, boiled them in baking soda, and then baked them in the oven.
They were quite tasty, and continued to taste good even after a few days kept in the fridge.
3. Doughnuts were something else I wanted to try. There is nothing better than a cup of dark coffee with a lightly-sugared plain doughnut.
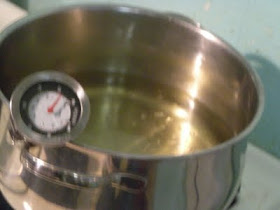
We used some kind of fat (will have to ask Mr. Bread Maiden which it was) to fry these.
Then we let them fry for about 30 seconds to a minute on each side until they were nice and brown, and let them cool on a paper towel.
Like biscuits, doughnut dough scraps don't do very well if you try to roll them back up after the first roll-out. So that's what the pointy pieces are next to the nice round doughnuts.
I even made doughnut holes! The best part about home baking is that you can adjust the amount of sugar to your liking. At the Bread Maiden household, our liking is "not very much, thanks."
That's about it for now on the baking front. I'll try to be more prompt on my entries. However, my big baking project, my fruitcakes, won't be ready for another month. You'll just have to be patient! Love, Bread Maiden.
Saturday, October 10, 2009
back in Austin!
wow, it's certainly been a while since I've posted here. I've just been really busy. Now I'm back in Austin, not that that means I'll have a ton of free time, but at least I can squeeze in a quick post letting my readers know what's been going on with me in the world of bread.
1. After a desperate attempt to save my sourdough starter, I decided to throw it out and instead started another one from Slow Learner's sample, which I had actually given her a few months prior. Now that I know what happened, I will make sure it doesn't happen again.
2. I spent the summer mostly making pies. The fruit was so good in DC that I switched gears a bit and focused on delicious flakey crust and fruit filling. I also became a fan of Dorie Greenspan!
3. Jam! The fruit also inspired me to dabble a bit in jam, although that was slightly less successful. Here's a sample:
4. Dorie Greenspan's Pear Tart! This isn't my favorite, although it is Dorie's and Mr. Bread Maiden loves it too. I just felt like it was a little too sweet and too much work for what it makes. But try it for yourself.
5. Kugel! In honor of Rosh Hashanah, I made a sweet kugel with honey and apples. It was really delicious and terribly unhealthy for you!
6. Challah! I guess I was on a roll.
7. Fruitcake! There will likely be a post about this later because it's actually bread, not like any of the above. So stay tuned! We've tried it and it's really good. The brandy helps.
So, now you know Bread Maiden is alive.
Monday, May 18, 2009
Sourdough Starter Troubles
First, I would like to apologize in advance for what is perhaps an overly technical, and certainly rather boring post to those unitiated in sourdough culture (sorry also for the terrible pun).
I have been baking with a sourdough starter for nearly a year now. As regular readers know, I began my starter using leftover yeast from Mr. Bread Maiden's beer brewing activities, instead of the typical Reinhart "pineapple juice" formula. This allowed for the yeasty beasties (technically S. Cerivisiae) to procreate and become usable much faster.
And life has generally been grand. I keep two starters, at 100% and 75% hydration, and keep them in the fridge until the day before I need them, when I build them back up on my kitchen counter.
However, last week things took a turn for the worse.
Here is the story.
My mother in law (Slow Learner, her self-given blog nickname, not something I would ever call her since she is wonderful) was helping me make sourdough. In anticipation of her arrival, I transfered my starter (which I had previously kept in a small Ball canning jar) into a very large pickling jar so I could build up a large amount of starter that we could use.
Since I was busy with other breads, I gave her the ratios for my fail-safe (or so I thought) 1-2-3 Sourdough. We left the dough to sit overnight, doing several stretch-and-folds to strengthen the shape. Each time, it was forming a stronger ball of dough. All seemed to be going well.
Then, for the final shape, something went terribly wrong. Every time I folded the dough, it became stickier, goopier and harder to manage. It stuck to everything, no matter how wet my hands were or how much oil we used to grease the bowl. It was like there was no gluten at all. It was awful. We tried adding tons of flour at the very end, but this resulted in a crumbly dough with no flavor.
I initially thought that maybe the 1-2-3 ratio aspect of the dough had left my poor MIL confused and that the ratios of flour, water, and starter had gotten mixed up. It certainly did not look like 66% hydration dough, or even 75% dough. It was liquidy and not firm. But the facts didn't make sense; it had acted like firm dough when we had mixed the ingredients and throughout the process until the end.
When I tried to make sourdough again, it ended up sticky and flat, just as before.
Clearly, something was wrong at some stage in the process. But what?
I made other doughs with commercial yeast that ended up just fine. So the problem wasn't the flour or water.
The problem was definitely with the starter.
I went online to my favorite discussion blog, thefreshloaf.com. There, forums can answer any question you have about anything to do with bread.
Cruising through the various discussions, I came upon one entitled "Could my starter be destroying the gluten in my dough?"
BINGO! I read on.
Apparently, if starter is left too long without being fed, it develops the ability to eat protein (becomes proteolytic), i.e. gluten. The starter becomes too concentrated with yeast, and it begins feeding on the protein at an accelerated rate.
So, there were several problems at work here.
1. Moving the starter to a larger jar caused a concentration of yeast since I was not giving it enough flour to feed on at each feeding.
2. Because I had such a large jar of yeast, I was keeping it on the kitchen counter but not feeding it as frequently, leading it to develop the ability to eat protein. It also led other, more acid-tolerant strains of yeast, to thrive instead of the nice, yeasty-smelling yeasts that had been cultivated. This gave it the smell of acetone, or cheap nail-polish remover.
So how did I solve this problem? Well, it's not that simple. We are currently monitoring the starter to see if it recovers. If not, then I guess we will be returning home starterless (here's hoping my MIL, who I gave part of my starter to during her most recent visit, will loan me some back).
From the fresh loaf, I have gained the following insights to taking care of a sick starter.
1. Reduce the amount of starter you keep replenished. This meant dumping out a good deal of starter, and continuing to dump out about half the starter per day.
2. Keep the starter on the kitchen counter for a week, keeping a strict feeding schedule of one or two feedings a day. At each feeding, pour some out before replenishing it with flour and water.
3. Mix in a bit of rye flour into the usual feeding to generate enzyme activity. This is kind of like distracting the yeast from eating the protein.
We shall see if this works.
So far things have already improved and the starter is much firmer than before and very active and bubbly. I will keep people notified if the situation improves.
updates
So, as you might imagine, things have gotten pretty crazy for the Bread Maiden. Finishing up the 2nd year of grad school, packing up to head home. We also hosted Mr. Bread Maiden's parents for a week, wherein Mother-in-law Bread Maiden (actually Slow Learner on this site! Which is a bit of a misnomer since she is quite skilled at baking) and I set out on a whirlwind of baking that lasted three whole days.
Let me back up a bit.
I offered my bread-baking expertise as a prize in a silent auction. The winners were two friends of mine, and I gave them a list of breads I can make and asked them to choose five types. They chose:
challah,
multigrain whole wheat (I forgot to take a picture of the finished loaf),
kugelhopf au lard,
and two loaves of sourdough.
I set the date for delivery of said loaves for the week of Mr. Bread Maiden's parents' visit so the two of us could work together, since two of the breads were going to be fairly time-intensive.
Cough (challah) Cough. Ahem.
We made the loaves, and they turned out beautifully.
All, that is, but the sourdough. But that is for another post.
Saturday, April 25, 2009
In honor of Passover
This has been a very Jewish week in baking for the Bread Maiden. Now, the Bread Maiden may not be Jewish, but she does enjoy the occasional matzoh, either plain or with peanut butter. And who can resist challah? On Monday I made challah and Mr. Bread Maiden and I made the Most Decadent French Toast Ever.
One of these days I will post about it.
But that is not what I am writing about today.
Most weekdays are so busy that the only time Bread Maiden can bake is on weekends. She starts daydreaming about baking around wednesday. By thursday it gets really bad. Finally on Friday she can't take it anymore and as soon as she gets off work she has to come home and whip something up. Anything.
So when I was bored yesterday and needed a quick project, I decided to make Peter Reinhart's whole wheat matzoh.
It's so easy everyone. Seriously. It's like making pie dough without the frustration of mixing in the fat and such. It's just a simple dough with flour, water, and salt.
The only tricky part is rolling out the dough into really thin shapes. But we will get to that later.
Here is the recipe:
227g whole wheat flour
170g water
4g salt
Preheat the oven to 350F with a clean pizza stone.
ha ha! that's it! isn't it wonderful? You will need much more flour when you have to roll the dough out though, especially if you have a wonky plastic rolling pin like I do, which is a snap to clean but flour doesn't stick to it at all.
Mix the dough up in a ball, doing some kneading to build up the gluten. This is important. Don't take too much time doing this though, because technically you have only 18 minutes from the time the dough is mixed together to when it has to be baked.
Now divide the dough into eight equal-sized pieces.
Coat your rolling pin, the counter, your hands, and everything else with flour. Take one of your pieces and roll it as thin as you can possibly manage, flipping the dough every so often and re-coating with flour so it doesn't stick to the counter.
Reinhart says to use as little flour as possible, but this proved impossible, so I used a lot of flour. I don't think it matters.
Once the dough is all rolled out, take a fork and poke tons of holes in the dough. This will keep it from puffing up.
Open the oven and sprinkle a bit of white rice flour directly on the pizza stone. Close the oven again.
Now using the rolling pin or a pastry scraper or spatula, transfer the dough either to the oven (if it's preheated already) or to a baking sheet with a little flour on it.
Once the oven is ready, slide your first matzoh (or maybe first two, if there's room) directly onto the stone. Bake for about 10-16 minutes until CRISPY and hard. Then remove from the oven to a rack to cool.
How awesome is that?
These are so delicious, especially once they've had a chance to cool and condense. They become even thinner than when you first took them out. They are great with everything because the taste is so mild.
I decided to break them up and make crackers.
Now you need to make these! Go now!
Saturday, April 18, 2009
Spent-Grain Bread and More Bread Math
Lately I've been pushing our concept of bread to the limit. While I'm inching back a little bit, the idea of using different kinds of grains in bread remains something I want to explore further.
Beer is called "liquid bread," because the combination of grains and yeast is transformed into a delicious, wheat-y, amber-colored beverage. However, those grains are usually discarded after the mash stage is over. Reinhart's Whole Grain Breads takes up where the beer brewer left off, and creates a bread with tons of flavor using these spent grains.
So what do spent grains look like? Mr. Bread Maiden was brewing a wheat stout, so the grains are characteristically dark:
The bread begins as Reinhart's typically do, with a biga and a soaker the day before baking. The spent grains are mixed in on the second day for the second and third risings. The biga is partly sourdough starter and partly a mixture of water and flour to get it up to the necessary weight for Reinhart's formula.
Here is where the math comes in. If I need 398g of 75% hydration biga, how do I get that if I only have 130g of 75% hydration sourdough starter? Obviously, if the biga was 100% hydration and I had 130g of 100% hydration, I could just subtract the amount of starter I have from the total I need, and then divide the left-overs and add 50% water and 50% flour. 75% hydration is trickier. You can't just calculate it in your head.
I warned you my breadbaking has gotten totally wonky.
My friends, this is actually really easy. It's a set of two formulas, the second of which you learned in the previous blog entry.
The first is to calculate how much flour you'll need. If you need 398g of biga, but you have 130g of starter, subtract 398-130 so you're just calculating how much you NEED. You need 268g. ok.
now set up the equation like this:
Flour= (needed biga weight)DIVIDED BY(1 plus hydration)
so Flour= (268)/(1.75) = 153g of flour.
Now you need to figure out how much water you need.
Water= (Flour) TIMES (hydration)
so Water= (153) * (.75) = 114g of water
Wasn't that easy? You can even check the math:
114+153+130=397. Ok, not 398, but pretty darn close.
Ok, now we can move on.
On the second day, check on your doughs. Mix them together, then add in the 113g of spent grains. That's the weird dark stuff in this picture.
Now add the rest of the ingredients for the final dough.
Knead everything together for a few minutes, then let rise for 60-90 minutes in an oiled bowl.
After the second rise, shape and transfer the loaf to a sheet of parchment paper lined with rice flour. Let it rise another 45 minutes or so while you preheat the oven to 450 degrees with your dutch oven inside.
Once the oven is preheated, score the top of the loaf with a razor blade or sharp knife and stick in the oven. Turn the temperature down to 350 degrees. Let it bake for 25 minutes with the dutch oven lid on, then take the lid off and bake another 20 or so minutes.
Here is your spent-grain loaf! It comes out much darker than it came in because, according to Peter Reinhart, the spent grains have tons of extra enzymes and sugars that help to brown the bread and give it that nice golden color.